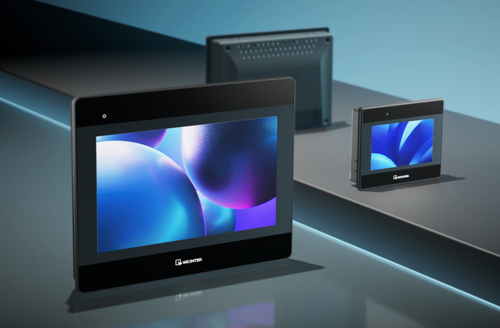
Human Machine Interface
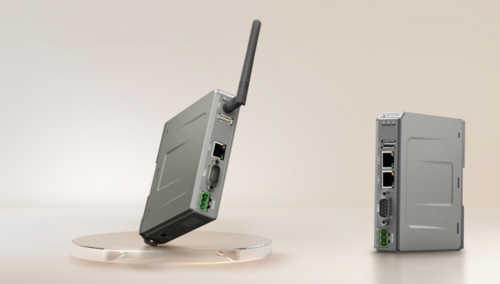
PLC and Remote IO
Accessories
For Weintek products
09.12.2025

Weincloud - working with the Dashboard service
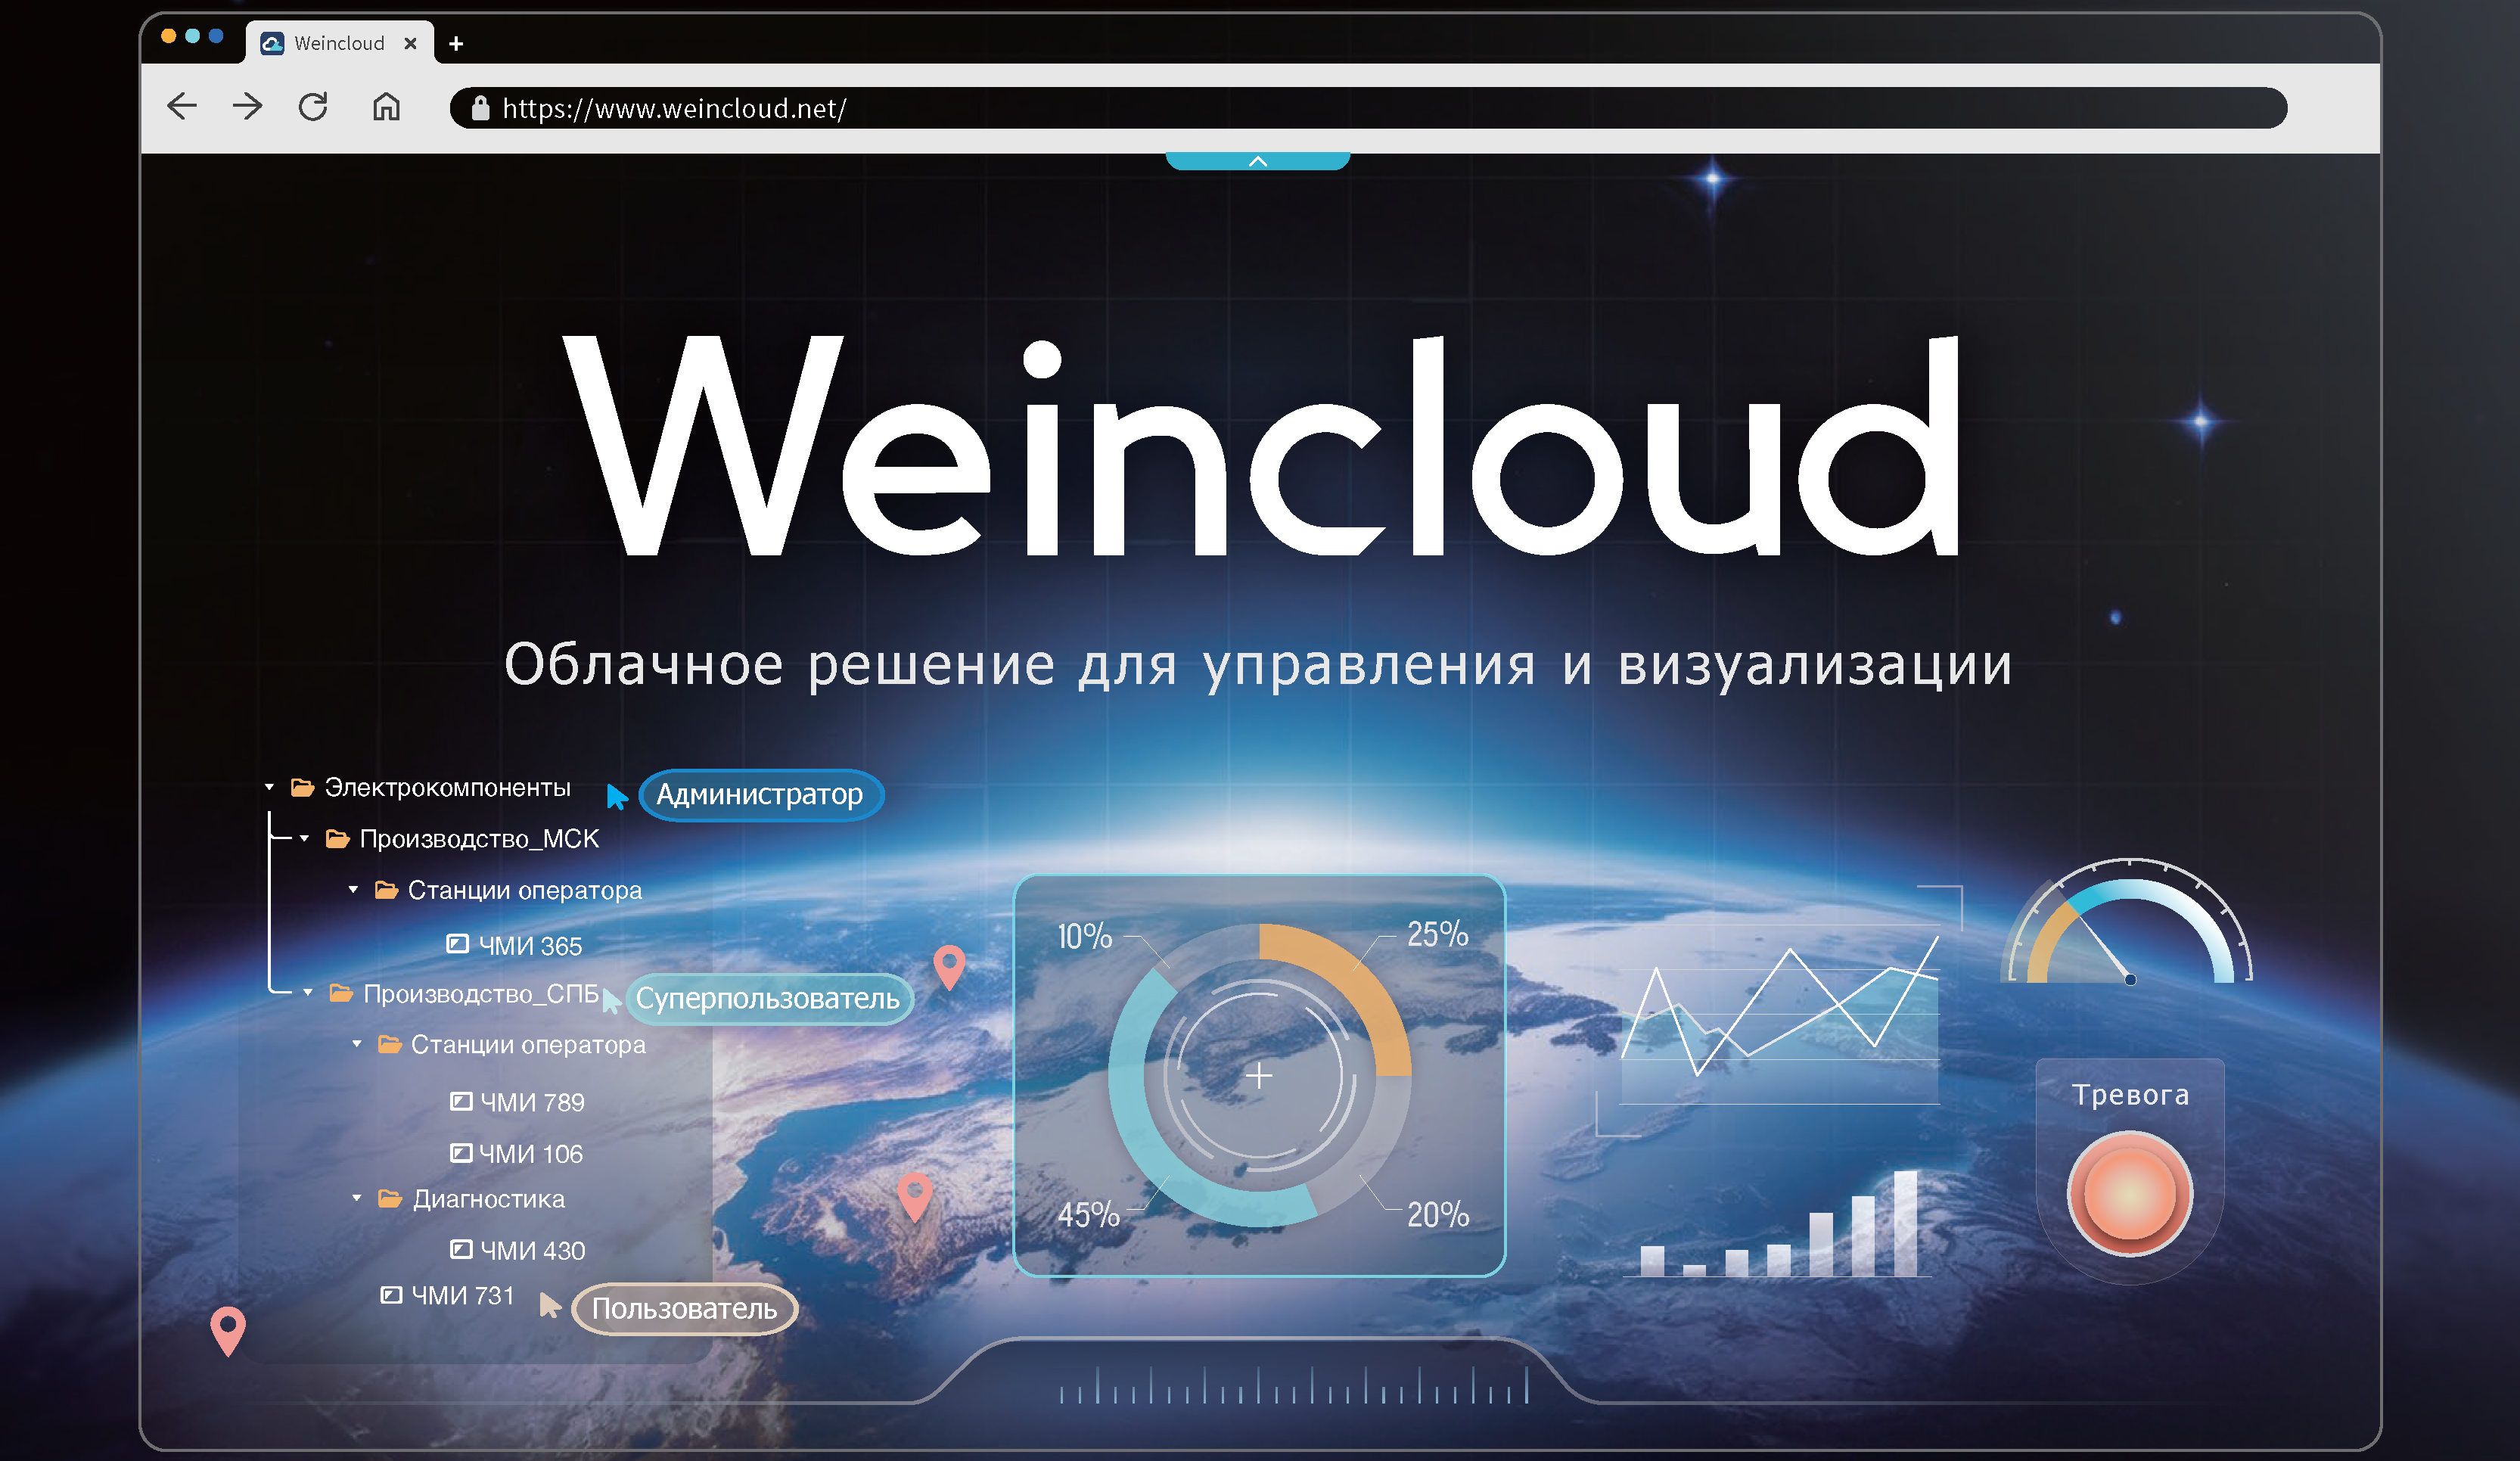
Table of Contents
What is Weincloud?
6 steps to create and publish a Dashboard project online:
What is Weincloud?
Weincloud is a domain extension that hosts the separate EasyAccess 2.0 and Dashboard services.
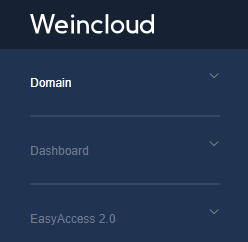
Domain The zone is a space with a hierarchical structure where you can create groups and add the required HMIs to them. For each panel or group of panels, you can Add your users and set specific permissions for these users. Permissions refer to whether a user can manage a panel or group. panels through the EasyAccess 2.0 and Dashboard services, as well as view general information about the panel.
Dashboard is a service for creating an additional graphical web interface, which Allows you to display and manage selected tags from one or more HMIs on a single screen via the Internet.
EasyAccess 2.0 - a service for remote monitoring of operator panels via the Internet. The service allows clients (PCs, phones, tablets) to connect to the HMI via a dedicated VPN server without additional routing settings.
6 Steps to create and publish a Dashboard project online 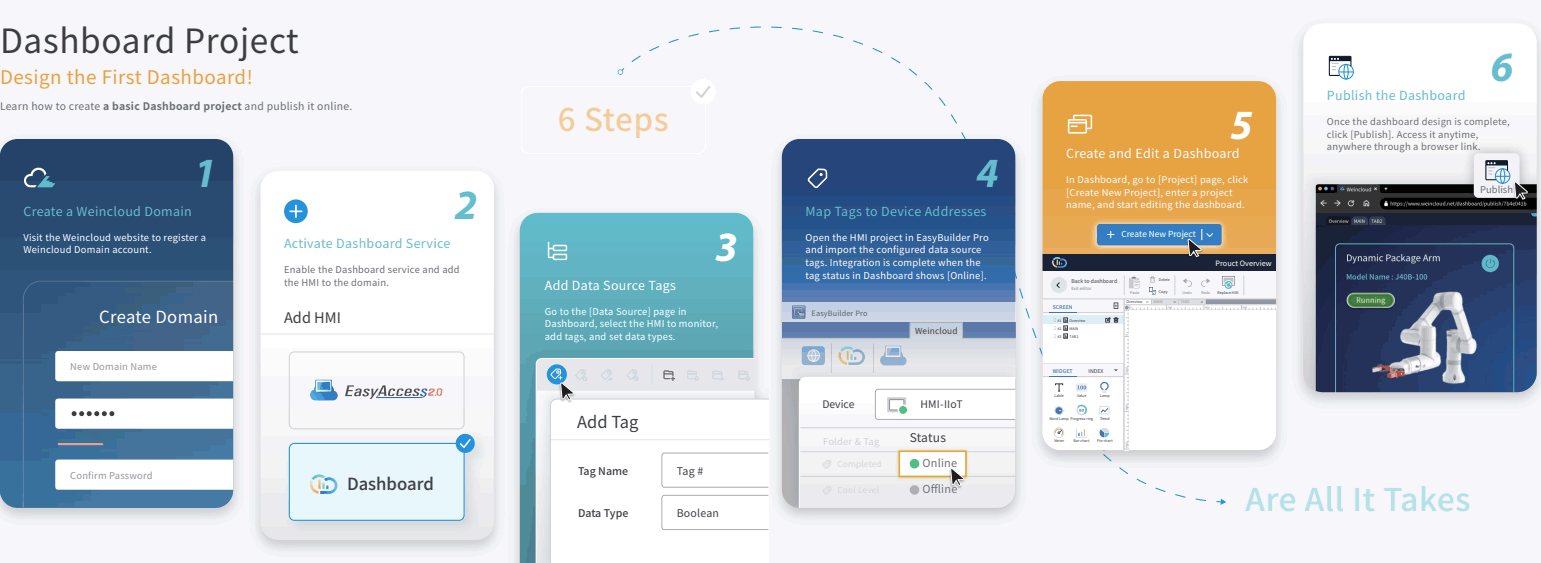
1. Creation new Weincloud domain
1. To work with services first of all You need to register a new domain.
Create a domain
After filling in the data and pressing [Registration] button, you must wait for the confirmation that will come to the specified email address.
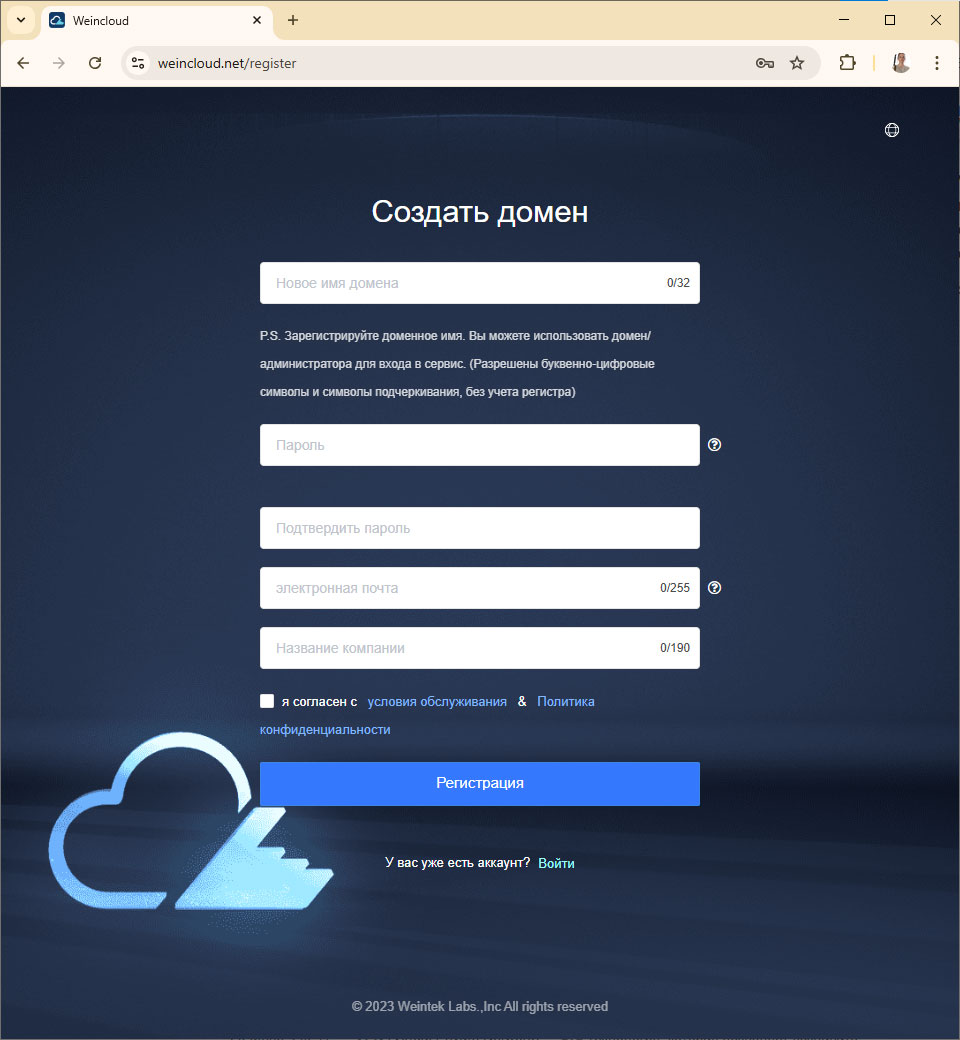
*page language can be select from the drop-down list:

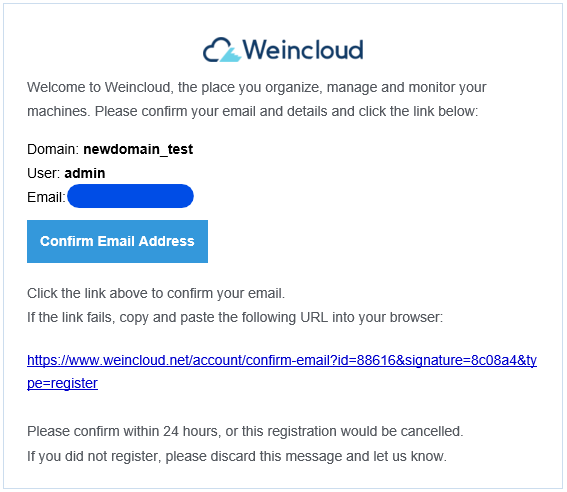
2. An email confirming your registration will be sent to you. look like this. Click the "Confirm Email Address" link in the email or Copy the hyperlink to register the domain.
After A page will appear with a notification about the successful registration of the domain.
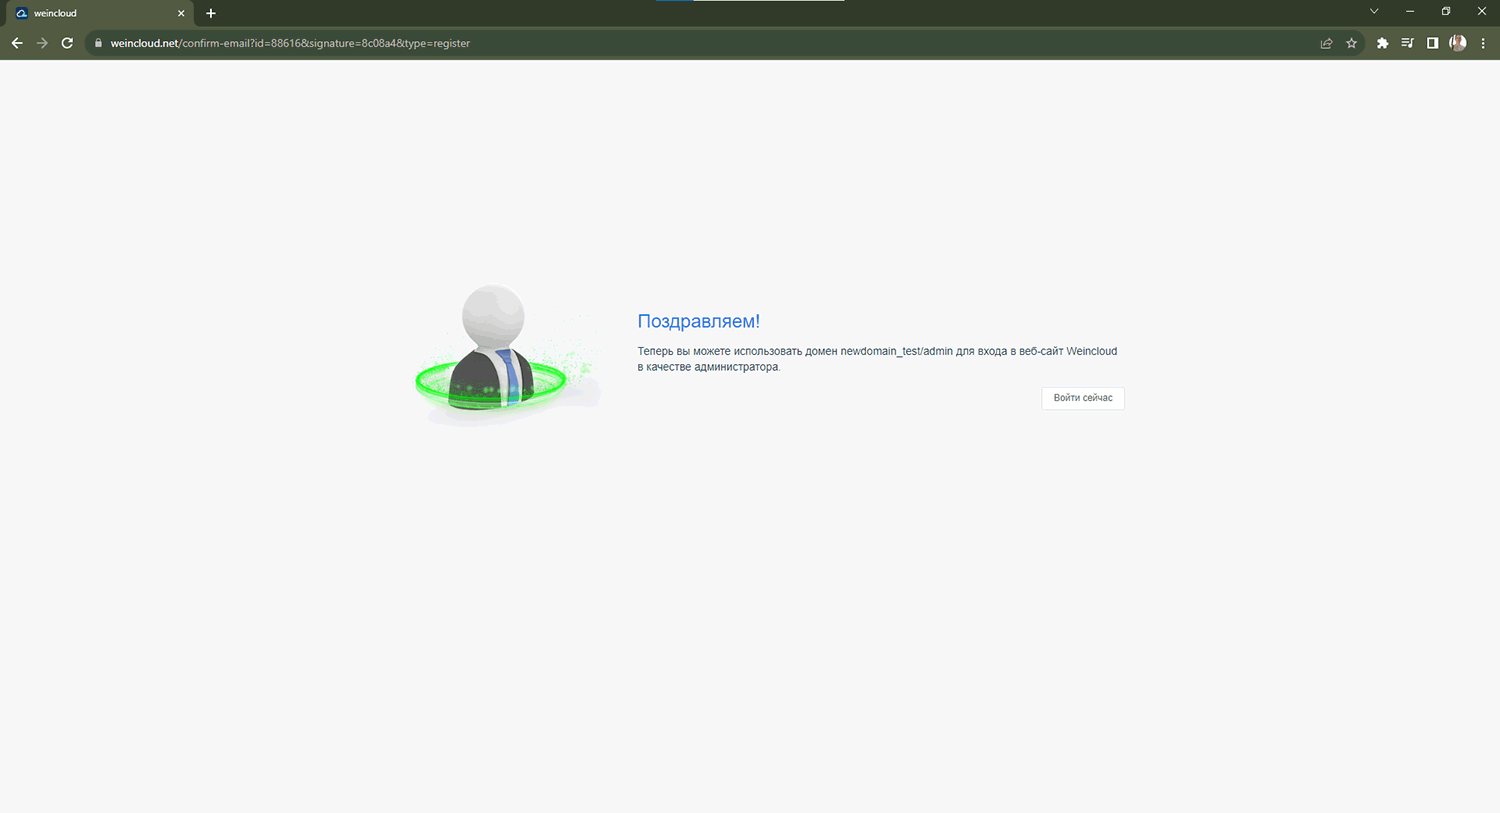
3. After completing the registration procedure, log in using the link: https://www.weincloud.net/login
Enter the name of the created domain, the name of the main user “admin”, and the password that was specified during registration. Click the [Login] button.
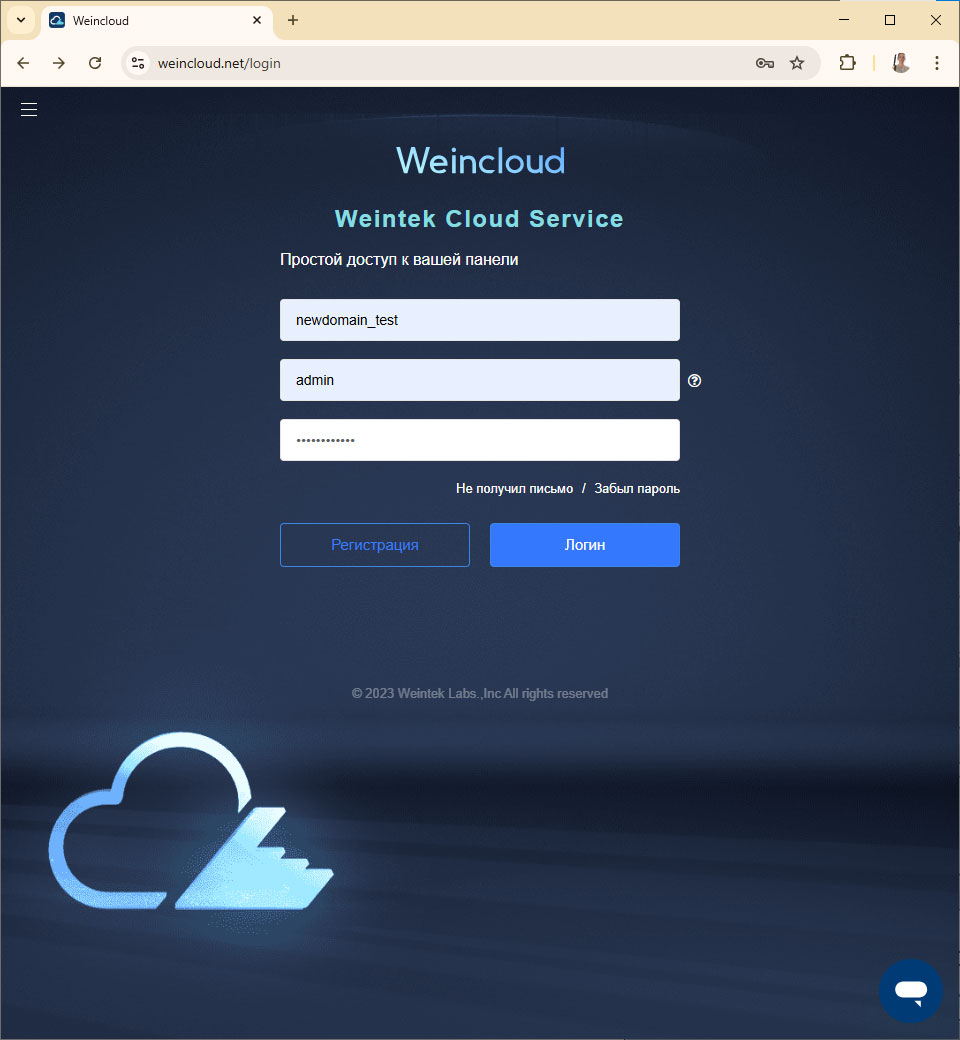
* Primary domain user is the administrator "admin". This user appears automatically when created domain. Only one administrator is available per domain. The default administrator can control all HMIs in the domain and has all permissions.
2. Working with the Weincloud domain. Activating the Dashboard service.
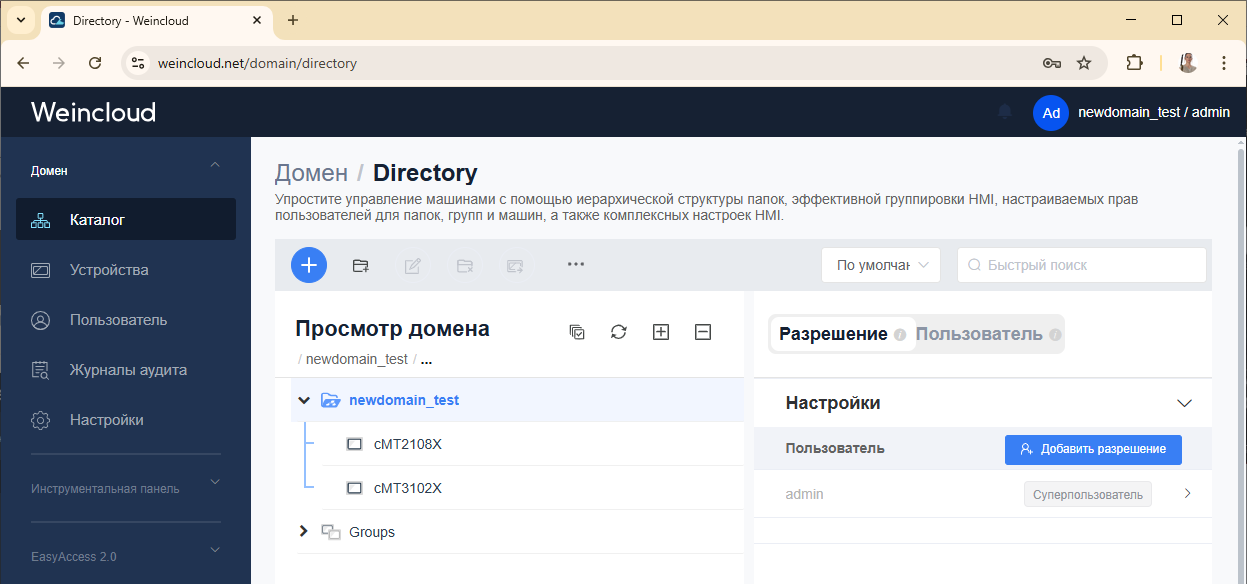
As described earlier, the domain is a hierarchical structure. The main group has the same name as the domain name (in the described case name - “newdomain_test”). All new HMIs are added to this group. By default, only user “admin” has access to manage panels in this group and has all permissions. It's also worth noting that the "admin" user is only available in this group. You can add new users to this group and set their permissions.
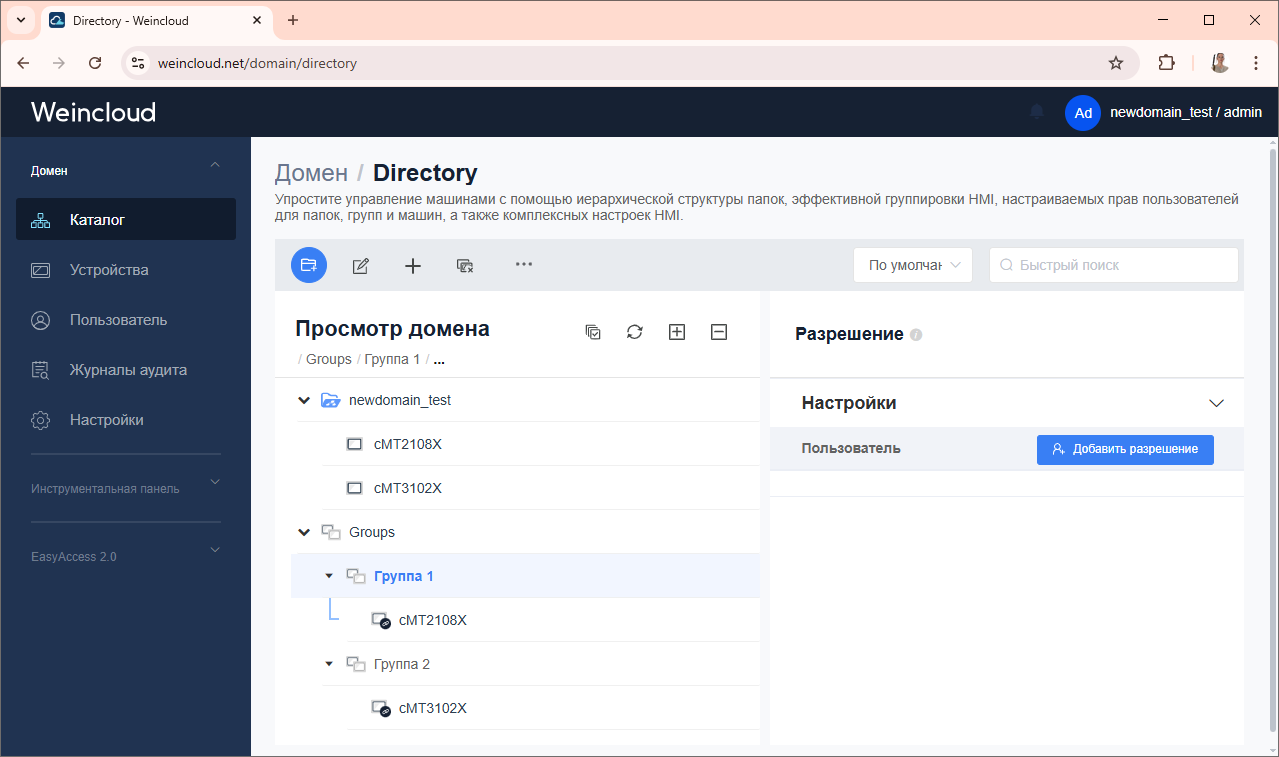
Besides the main admin group You can create additional groups in the “Groups” list and move the ones you’ve already added there. panels, and also configure the required users in groups.
Practical steps
1. Add a new HMI to the domain. Find HWkey hardware key in the HMI system settings. Find and copy this key. You can do this using the built-in web server on the panel in the EasyAccess 2.0 tab. 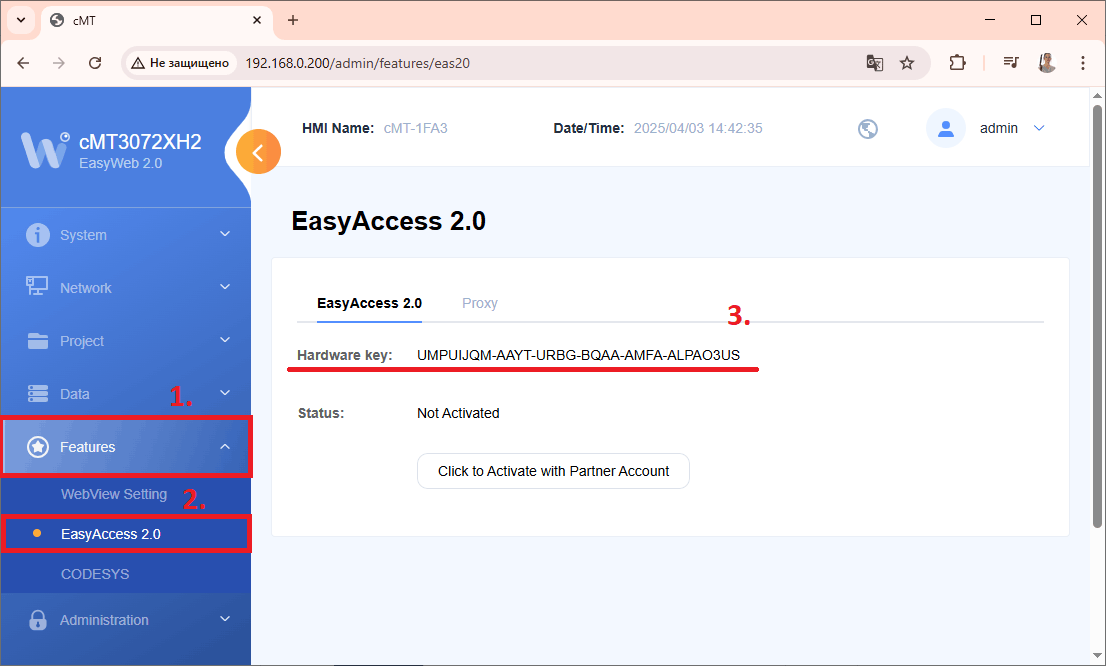
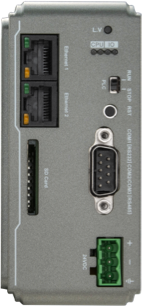
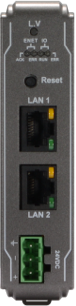
2. Next, connect the panel to the Internet via Ethernet interface 1 (WAN) and go to the Weincloud domain, where you need to click [Add panel] button.
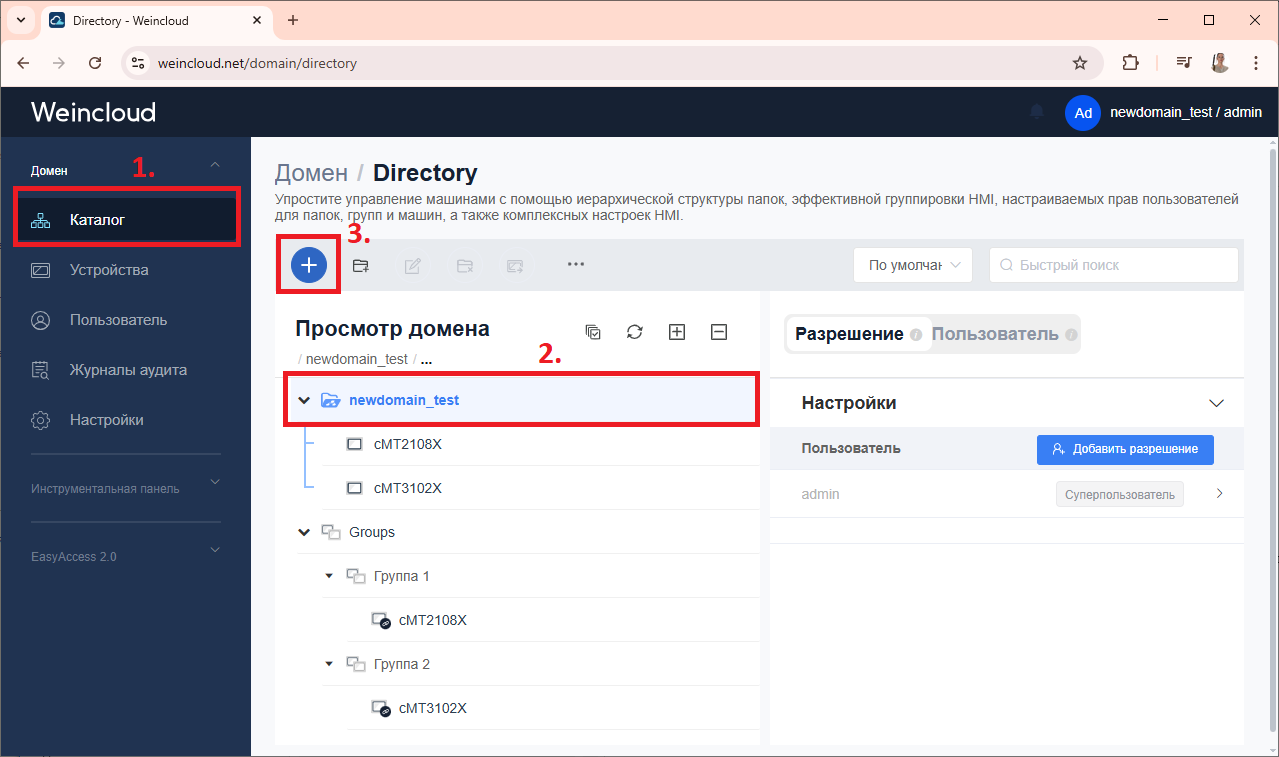
3. Since adding a panel to a domain without activating the related services it is useless, then you need to choose which one services should be activated for the HMI.
This example describes how to work with the Dashboard service.
Select the “Dashboard” service (also known as Dashboard), then select the activation type* and enter the previously copied hardware panel key without hyphens, click the [Place] button.
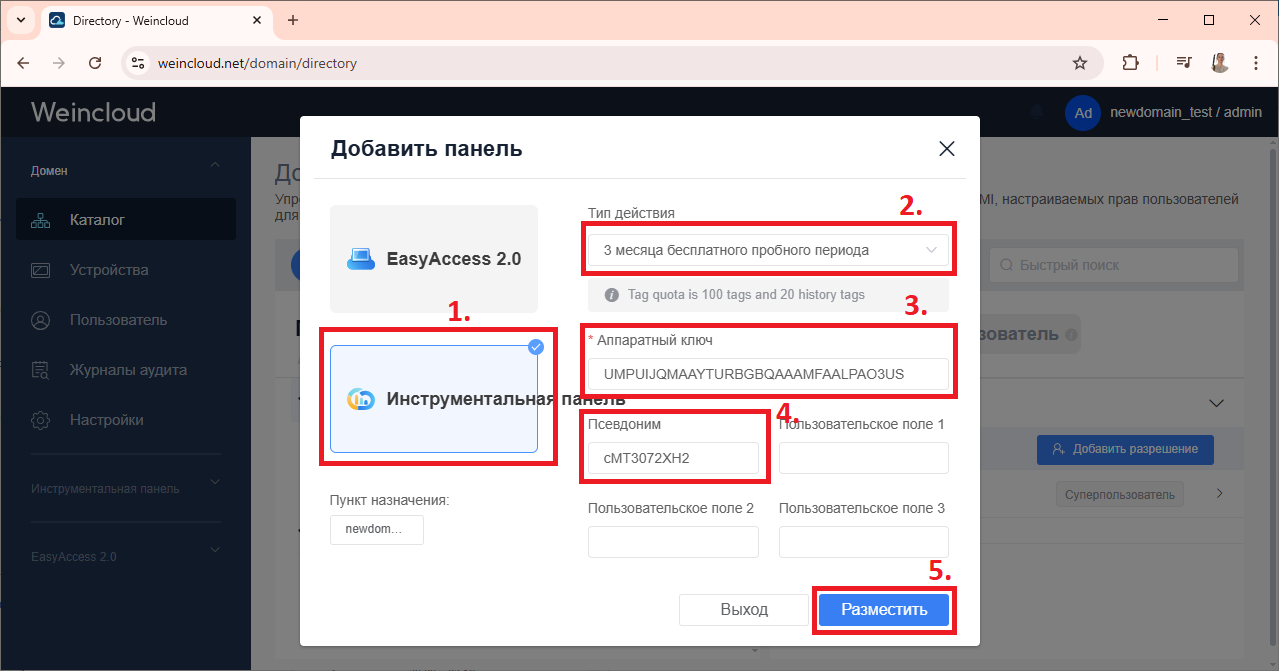
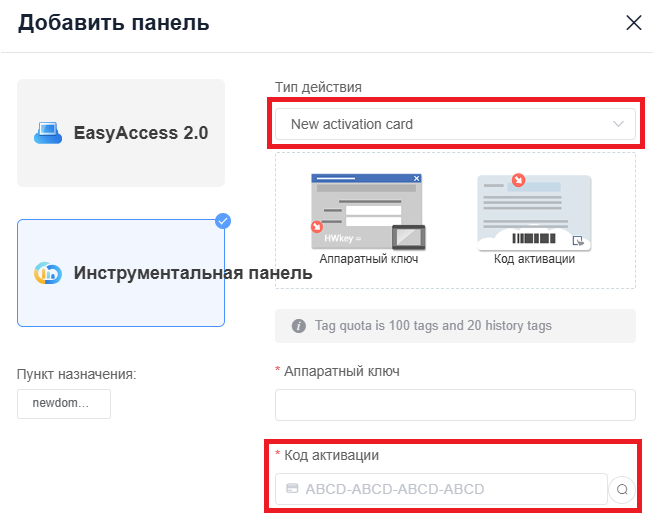
* A trial version is available to work with the service. period of 90 days. If you purchased a physical activation card, then you need to select the activation type “New activation card” and additionally enter activation code, which can be found on the back of the card.
4. You can notice that in the main directory A new panel has appeared on the domain. 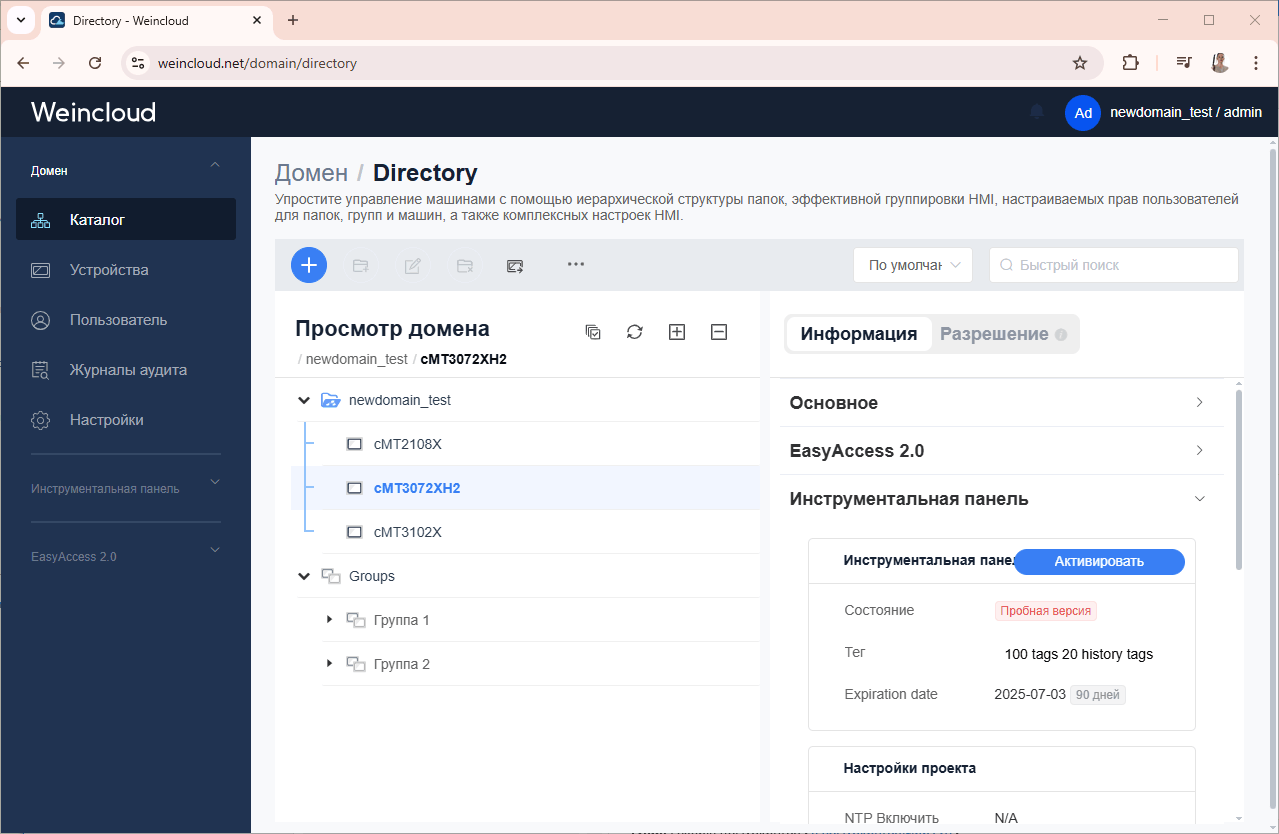
3. Dashboard tag creation
To work with the dashboard, you must first create the required tags in Weincloud, then activate this feature and sync Weincloud tags in the EasyBuilder project for the panel.
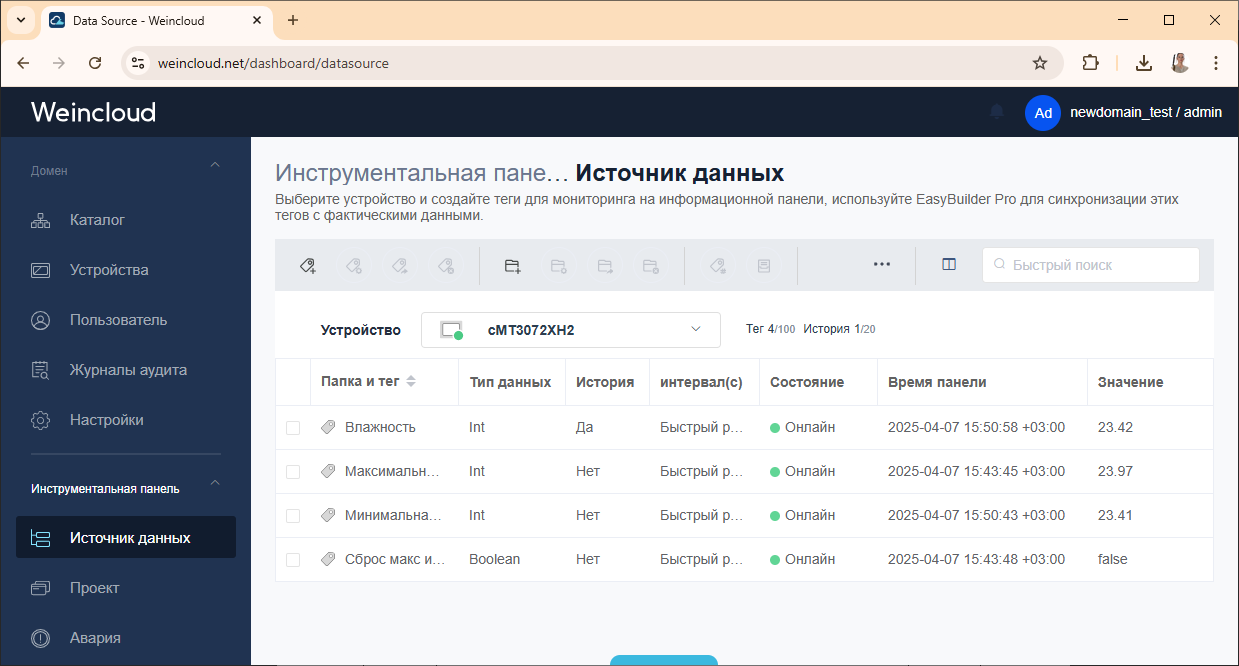
All work with tags is done in the tab Dashboard – [Data source] for a specific HMI from the list previously added. The number of available tags is also displayed here without the "History" function. and with a history recording function.
You can increase the number of tags for the panel using an additional expansion card.
Available options when adding new tag:
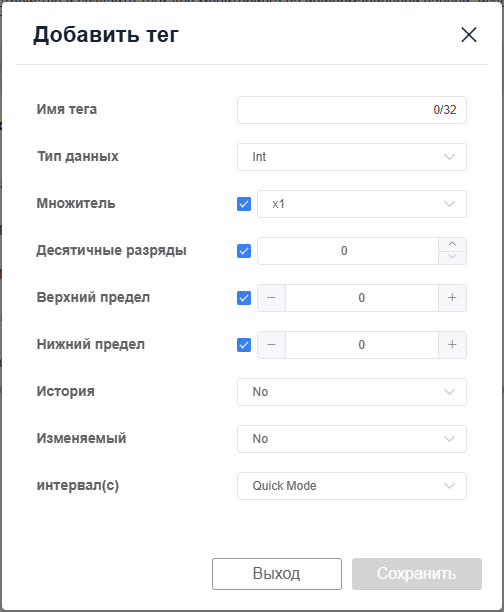
Data type – the format of the displayed data data in Dashboard (BOOLEAN, INT, FLOAT, STRING).
Multiplier – select a multiplier for values (using multipliers x0.1, x0.01, x0.001 you can customize the display decimal point)
Decimal places - choice the number of displayed digits after the decimal point, taking into account the multipliers x0.1, x0.01, x0.001.
Upper and lower limits – setting limits for input values (if the “Changeable” tag function is used).
History – a function that allows Store historical values on the Weincloud server for one year. Historical Values can be displayed using certain dashboard widgets, such as a trend and a historical table.

Also historical significance You can download using a backup, with the option to select a specific sampling period.
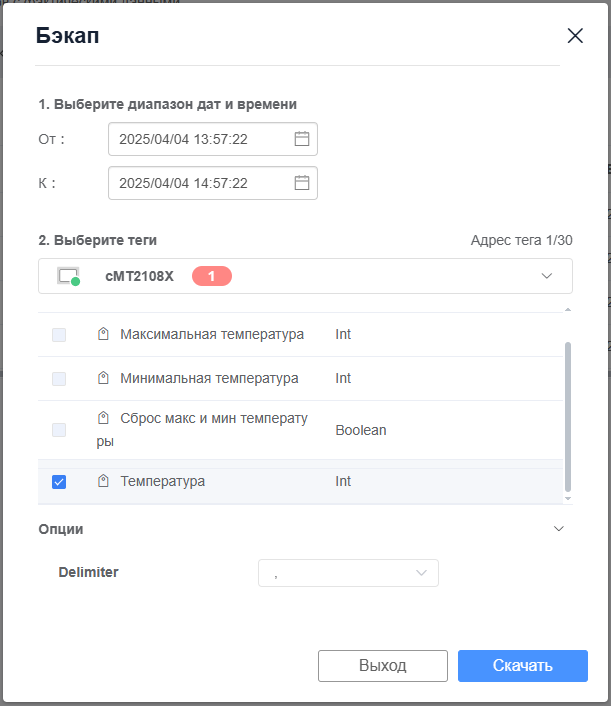
Migrating – a function that allows values to be written tag via Dashboard.
Interval – select the frequency of updating tag values. When selecting the “Quick” mode Mode" values will be updated as frequently as possible. Manual settings allow you to select an interval from 5 seconds to 15 minutes.
Please note that the historical tag value (the "History" function) on historical widgets (trend, table) will be updated every minute. The backup will contain the maximum sample rate.
Practical steps
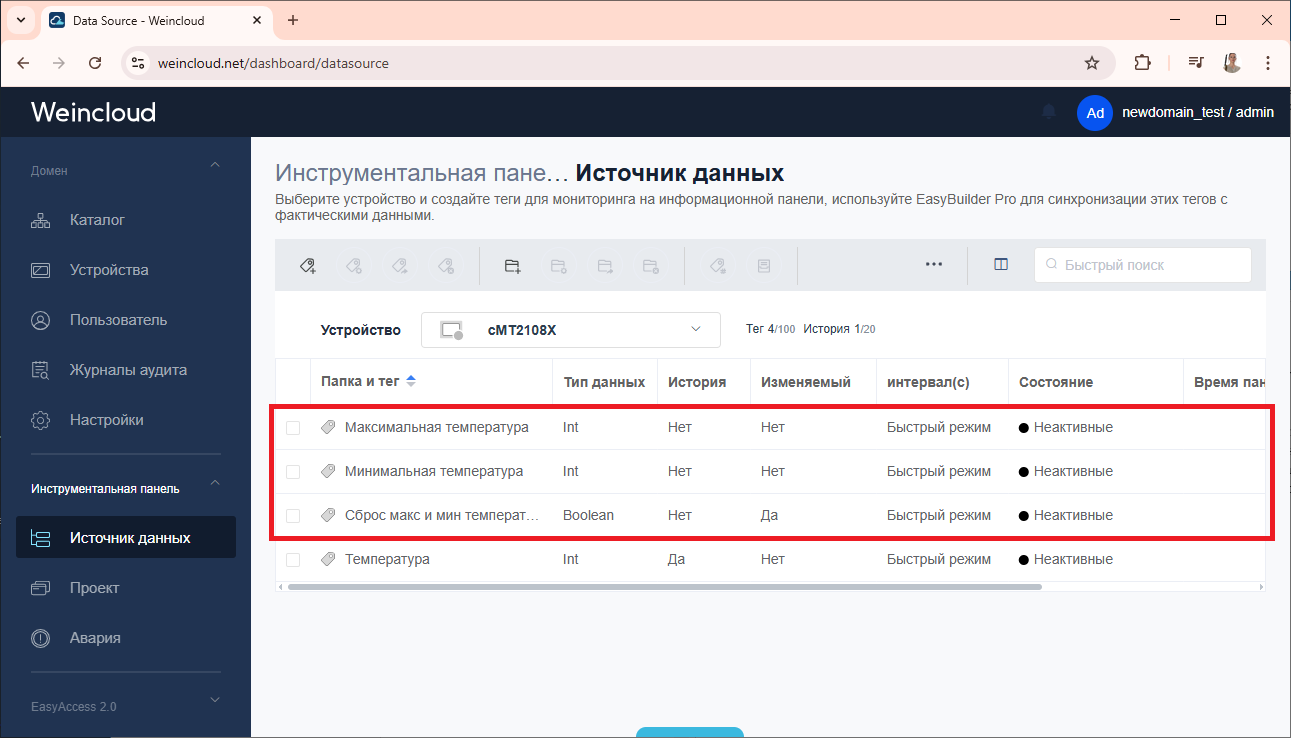
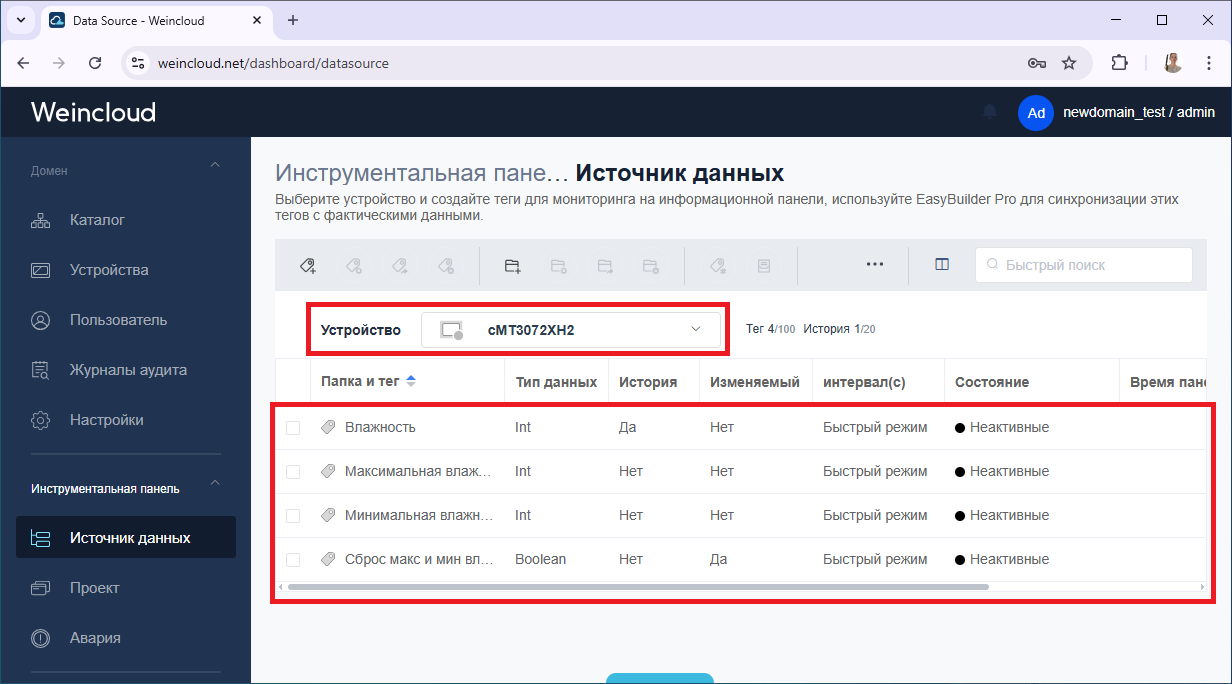
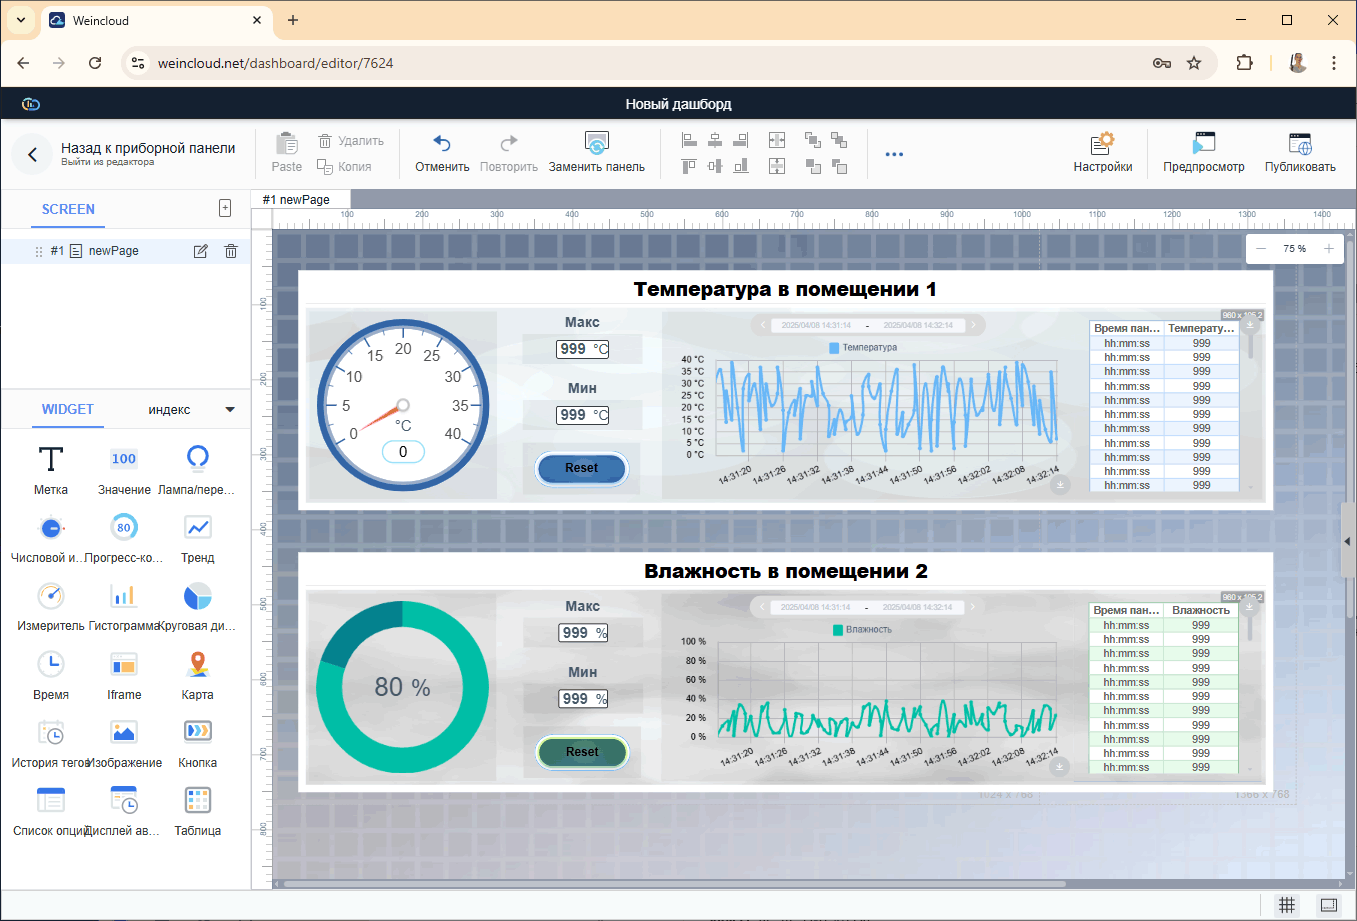
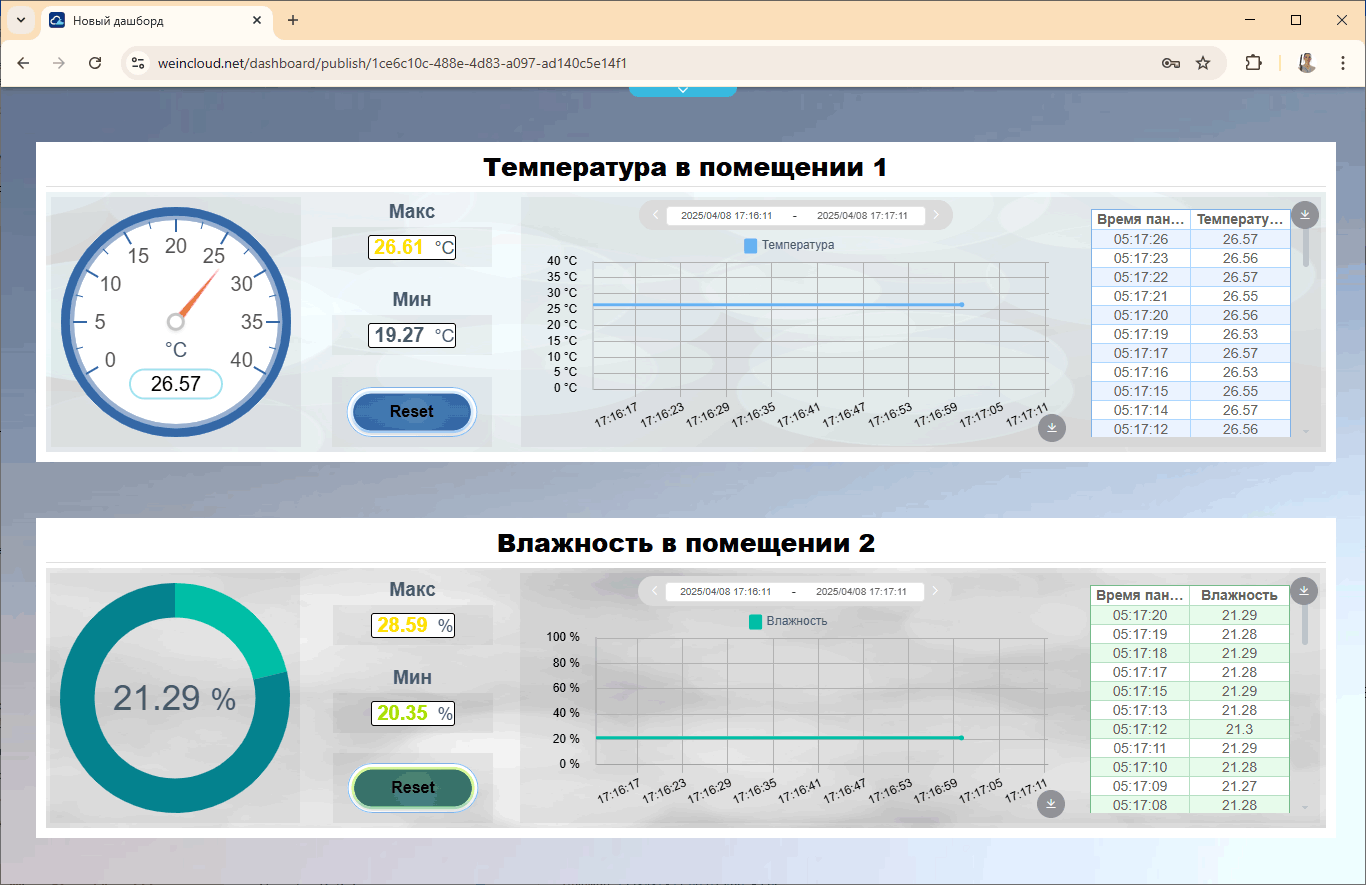
In the example that will be described below, two panels are used, conventionally located in different rooms, on one of which the readings from the relative air humidity sensor are displayed, %, and the second readings from the air temperature sensor, °C. These readings are combined using the dashboard on one screen.
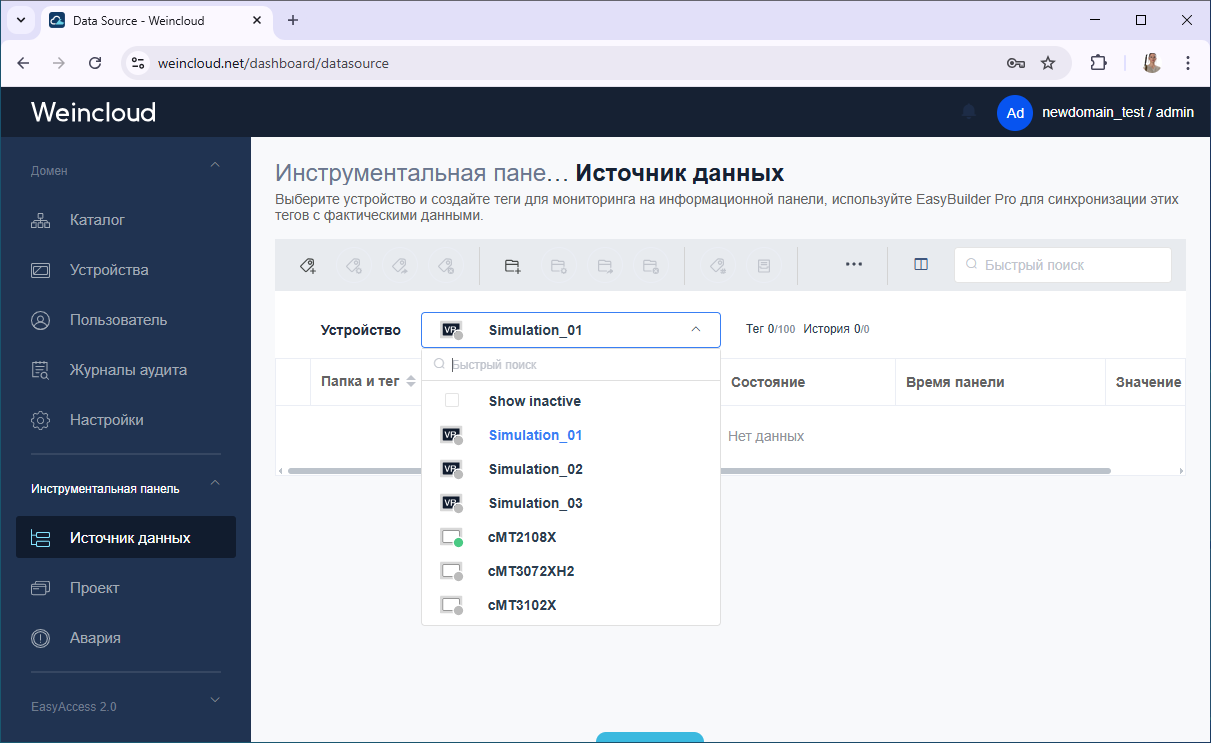
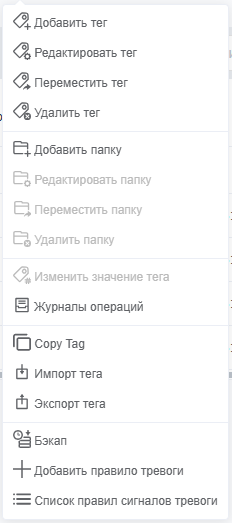
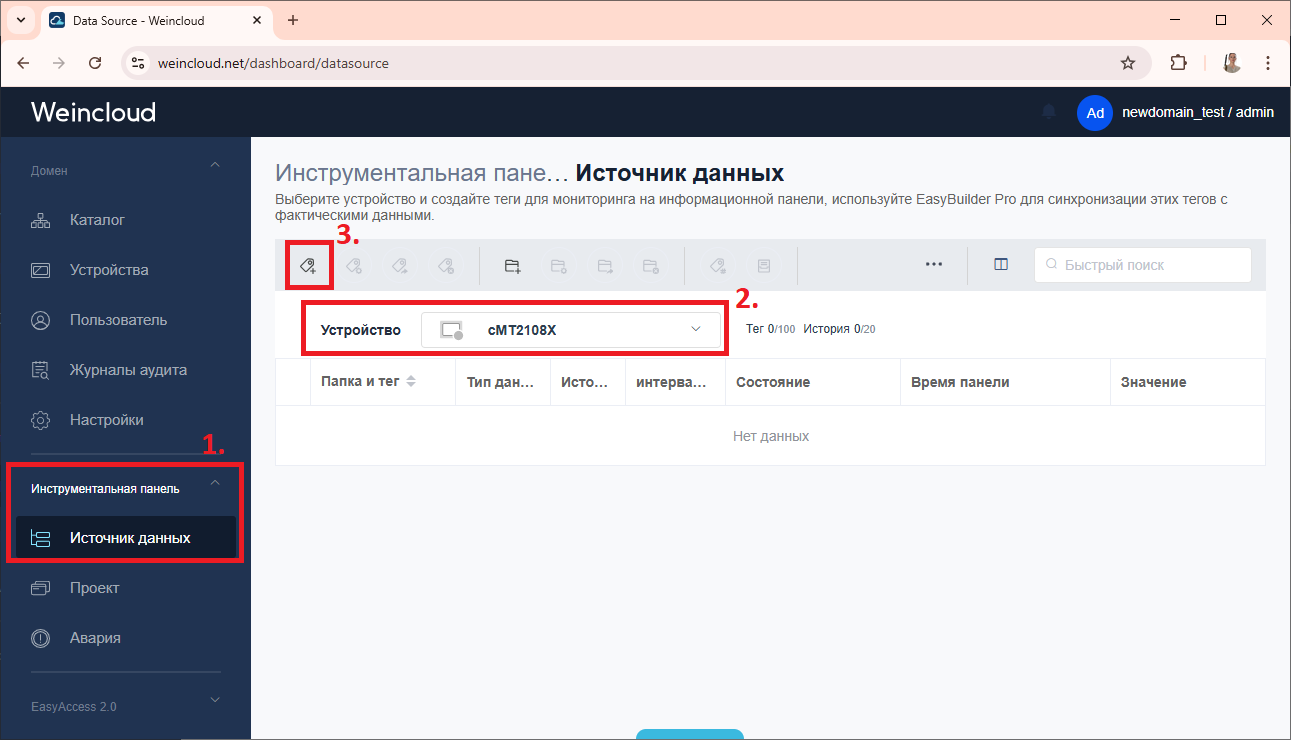
1. Add the necessary tags to the dashboard. To do this, go to the [Dashboard] – [Data Source] tab, select previously added HMI from the [Device] list and click the [Add Tag] button.
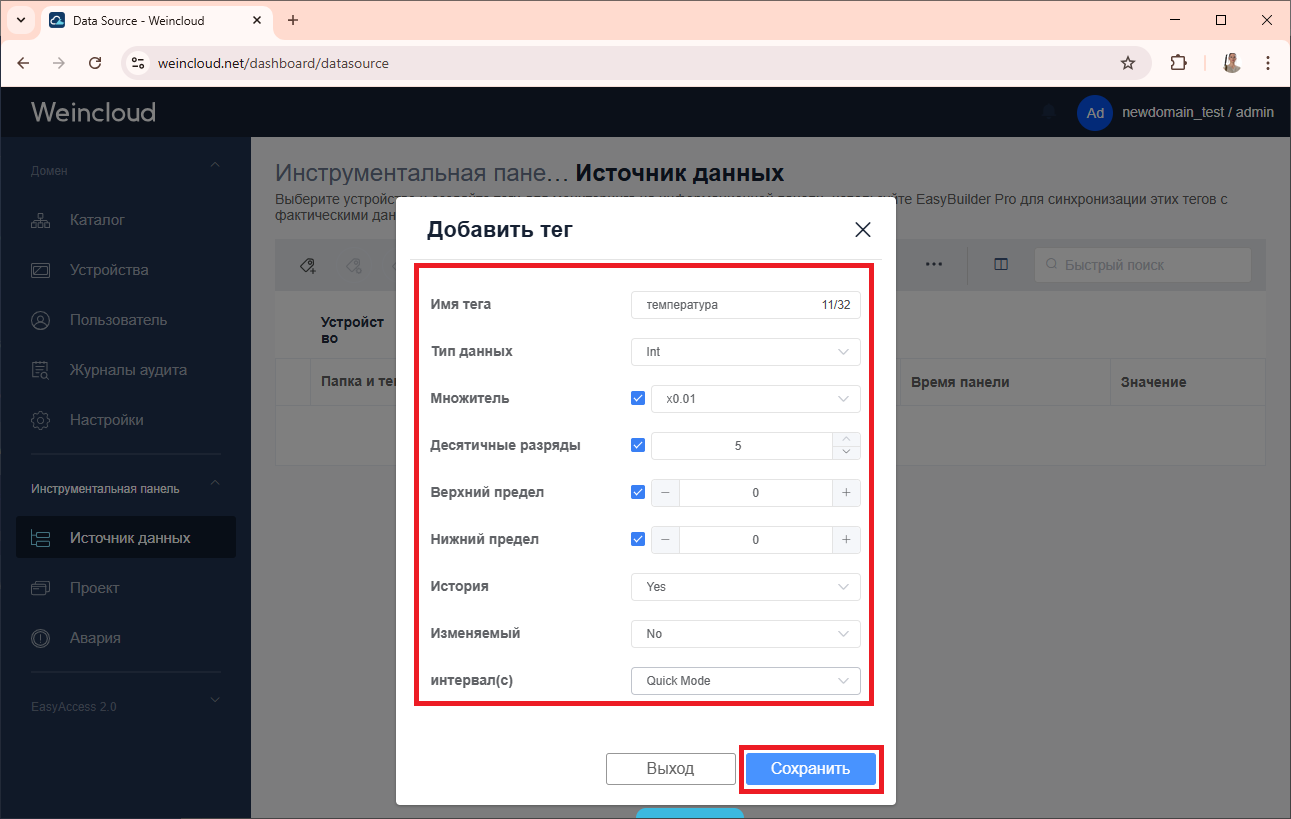
2. Set the name and format settings display tag and function data. Click the [Save] button.
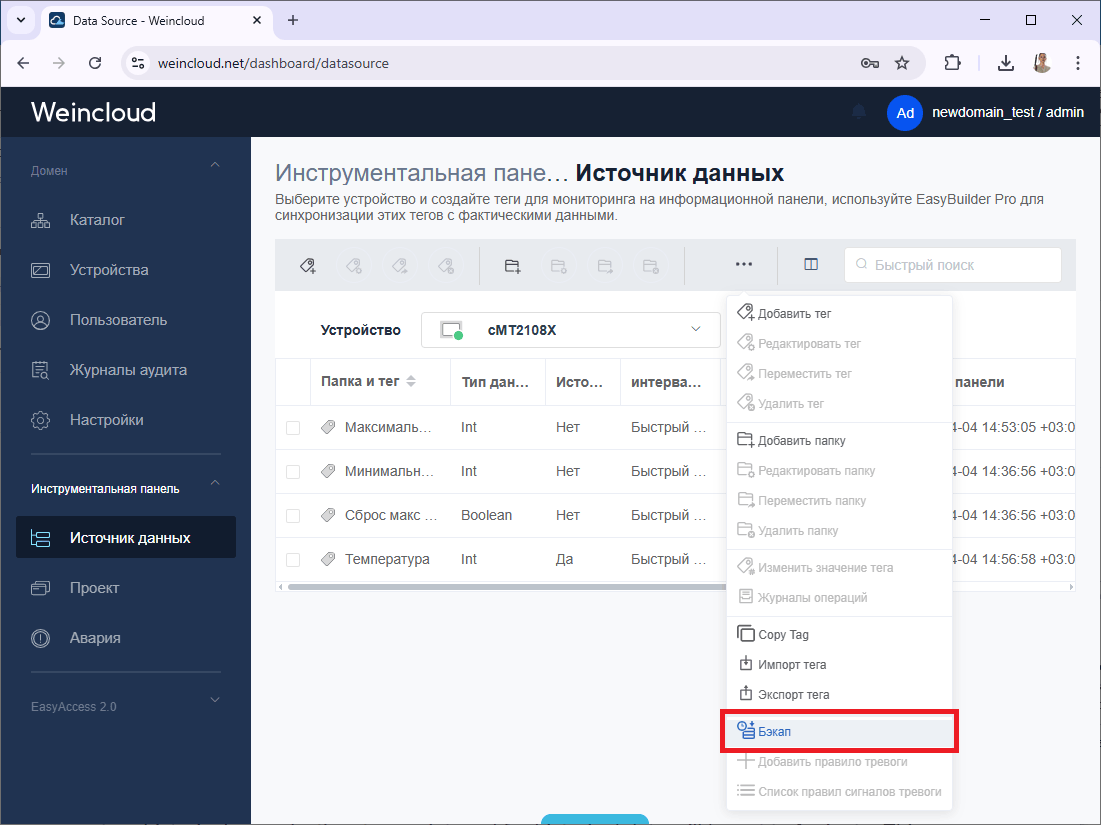
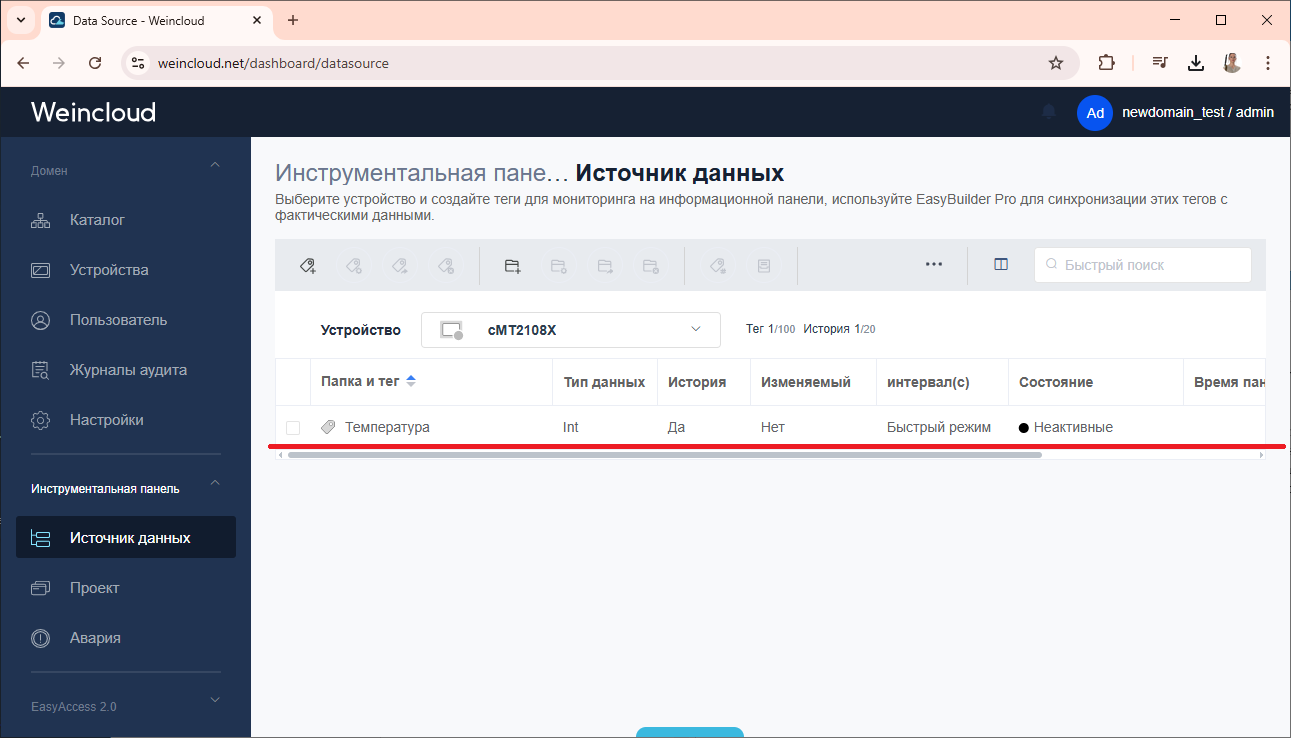
3. The list displays the created tag.
4. Add the remaining variables, that need to be displayed in the dashboard.
5. Also add tags for other HMIs whose values need to be displayed in the dashboard.
4. Synchronizing Dashboard tags with EasyBuilder
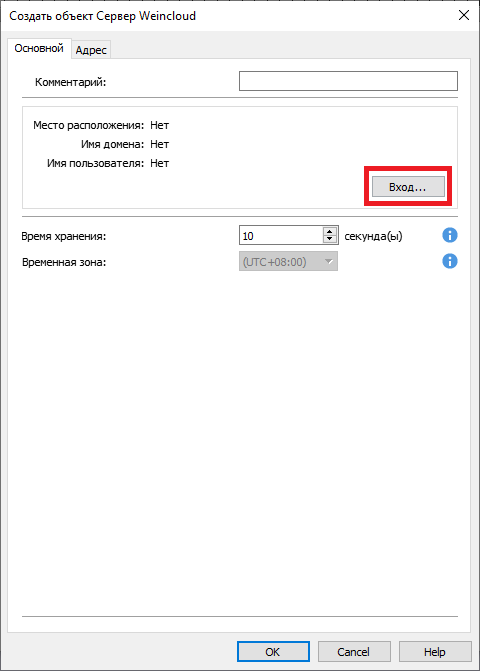
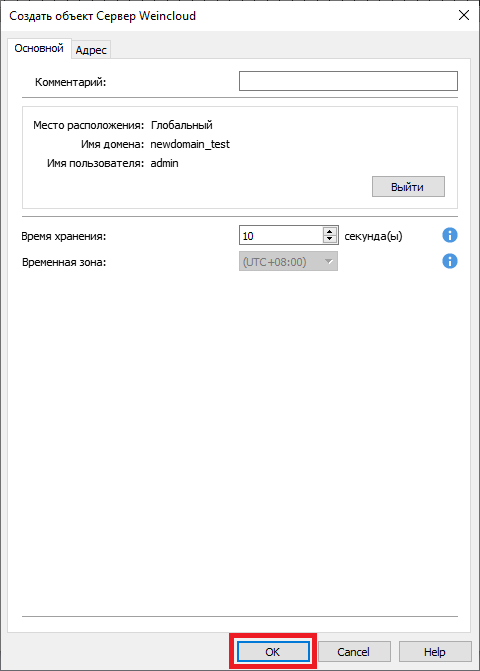
Tags created in Weincloud must be synchronize with the EasyBuilder project itself for each HMI. For this purpose, there is A dedicated tab on the main [Weincloud] toolbar – [Dashboard].
Before synchronization, you must first Activate the dashboard feature and then log in to the Weincloud domain. 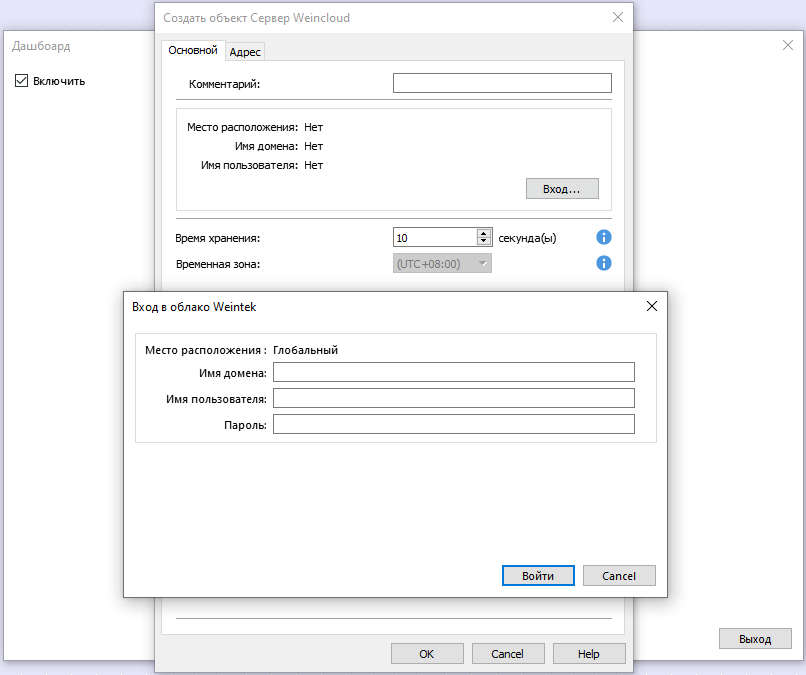
Time storage - if the server is Weincloud has not received a test message from the HMI within the specified time period, then the panel will be considered disabled.
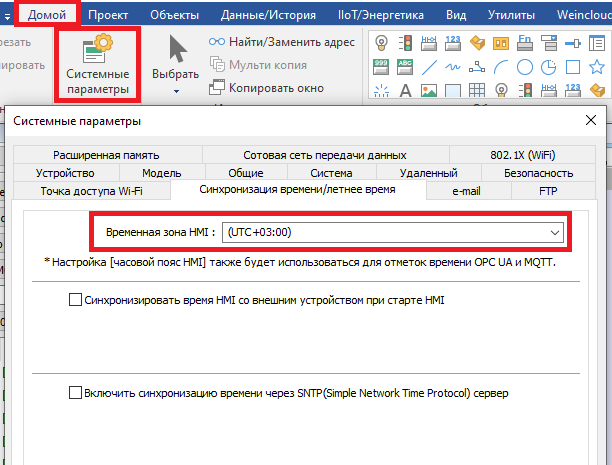
Temporary zone – timestamps in Weincloud will use this time zone. The zone can be changed in [System Settings] – [Time Synchronization] – [Time HMI zone].
In the project for monitoring the condition and control Connections to the Weincloud server can be configured and the corresponding registers can be used.
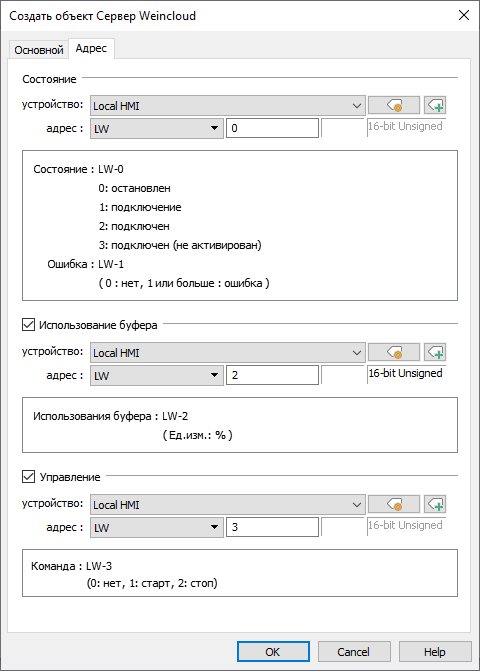
Status – display of connection status and errors with the server.
Error codes:
| 1 | Internal error, contact your supplier |
| 2 | Unknown error, please contact your supplier |
| 100 | The “start” command is repeated when the connection is active |
| 101 | The tags in the HMI project do not match the Weincloud tags. You need to synchronize the tags again. |
| 200 and more | Failed to connect to the server. Check the network and time settings in the HMI. |
Usage buffers – unsent messages, for example when a connection is lost, are saved in the buffer, the value in this register displays the percentage of the HMI buffer full. The maximum buffer capacity is 1000 messages.
Control – commands for managing the connection to the server.
Practical steps
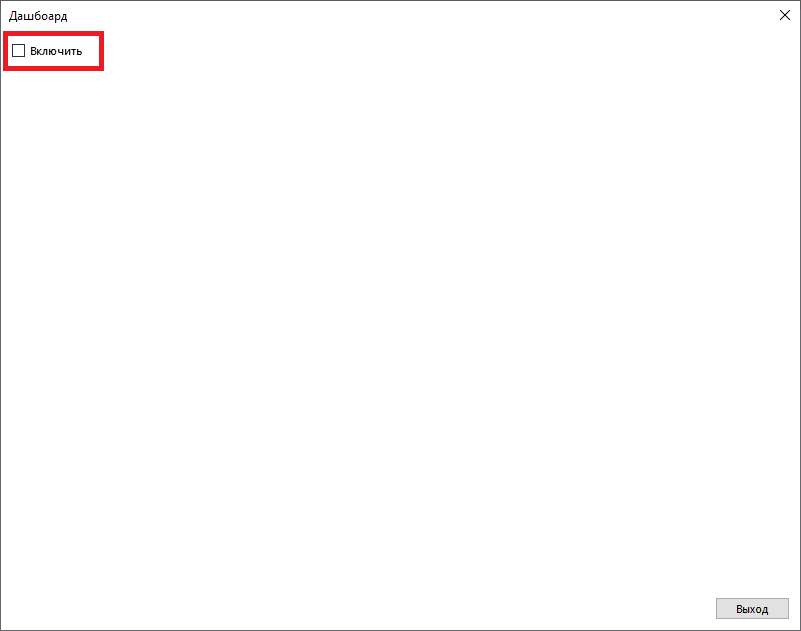
1. Go to EasyBuilder panel projects, Find the [Weincloud] tab and click [Dashboard].

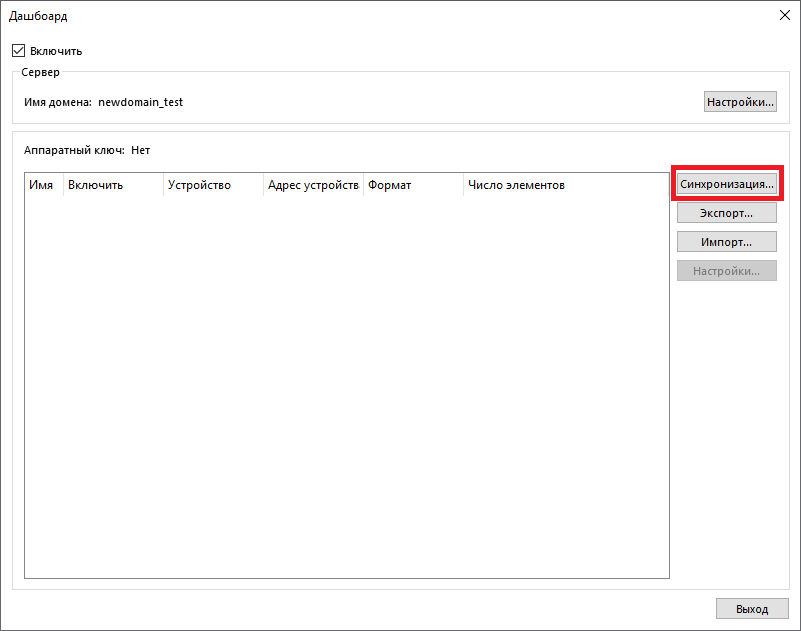
2. In the window that opens, activate the dashboard, by clicking [Enable].
3. In the next window for connecting to the server Click the [Login] button.
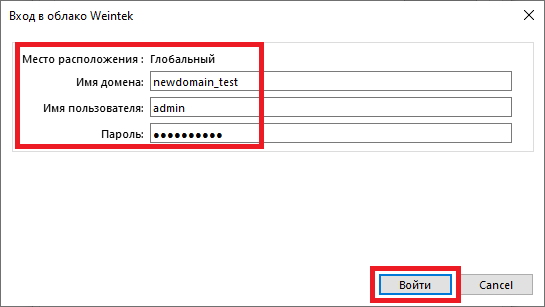
4. Enter the domain name, username, password for the user and log in by clicking the [Login] button.
For successful authorization, the PC must be connected to the Internet
5. If authorization is successful, you can see A window will appear where the current domain and the name of the logged-in user will be displayed. Confirm [OK].
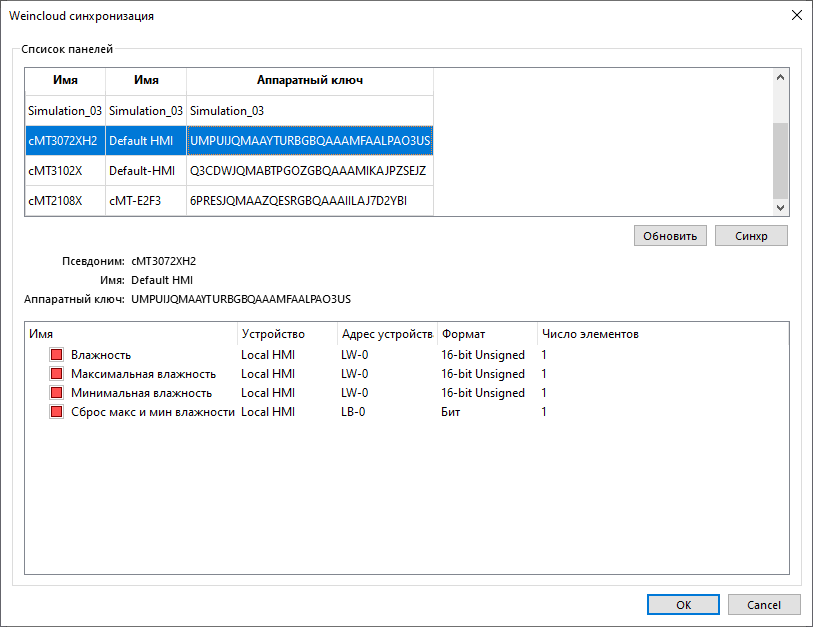
6. In the “Dashboard” window, click the [Synchronization] button.
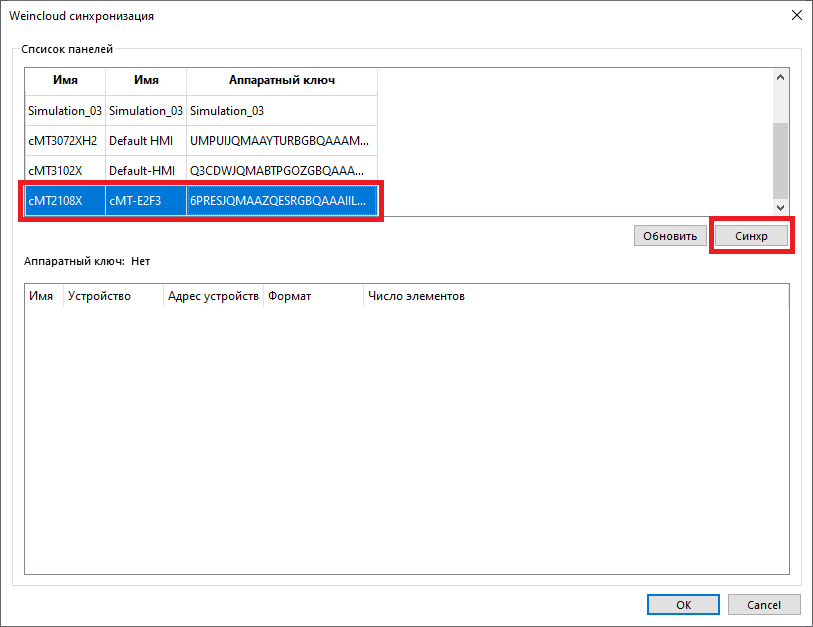
7. Next, select the required panel, which was activated in advance, and click [Synchronize].
8. After successful synchronization, you can View tags that were previously created in Weincloud. Confirm [OK].
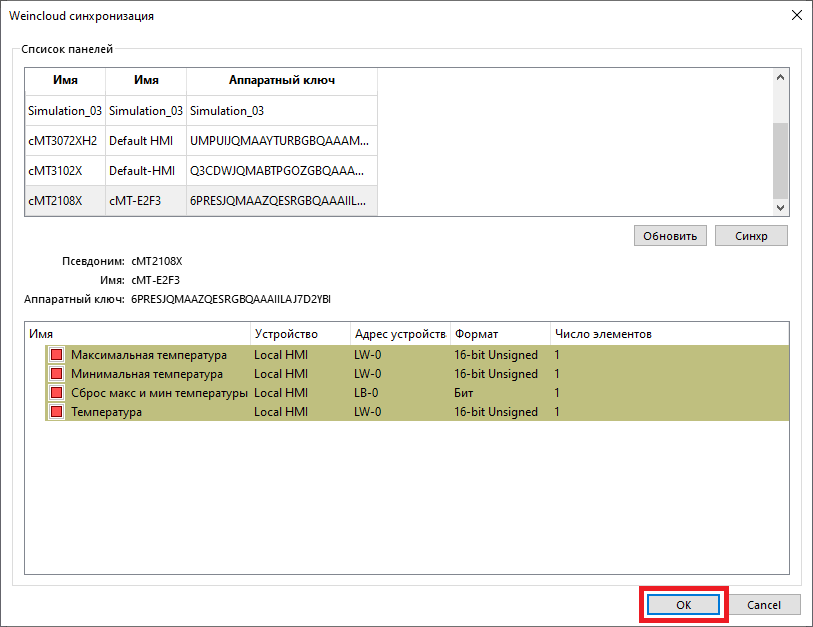
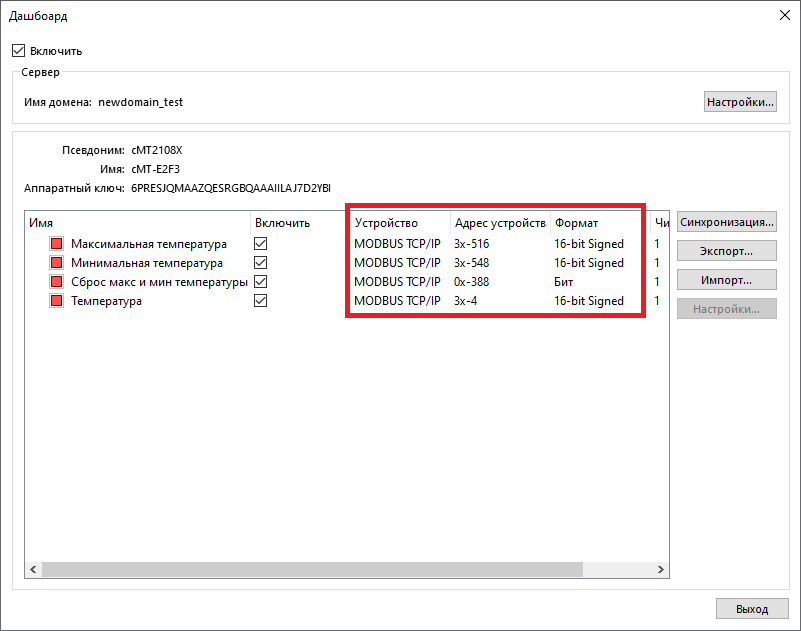
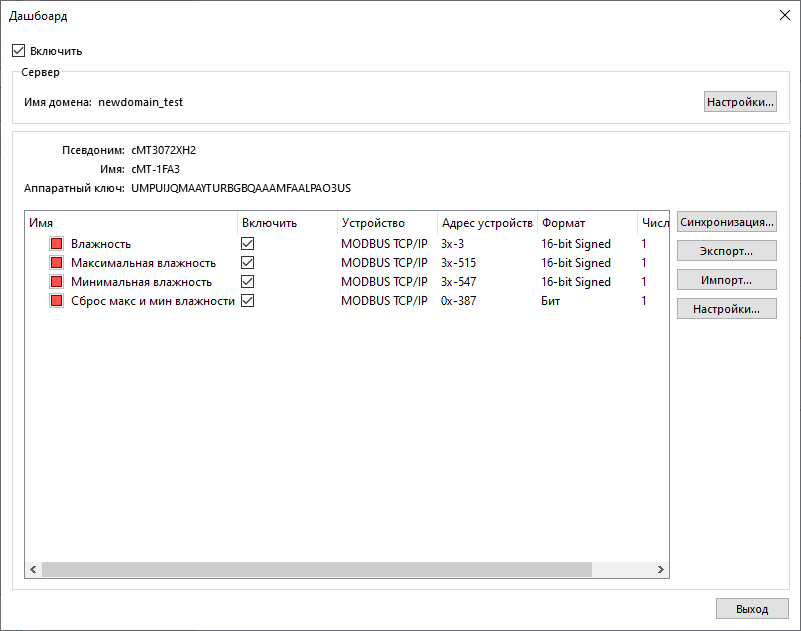
9. Tags are automatically linked to local addresses of the LW, LB panel. In order to link them to the required devices, It is necessary to manually edit their addressing and, if necessary, the data format.
10. In the corresponding EasyBuilder projects, synchronize tags for other HMIs.
11. Next, in the project system parameters Set your time zone in the [Time Synchronization] tab. This time zone will be used for timestamps in Weincloud.
12. Finally, upload projects with the dashboard feature enabled to the panel. As a reminder, the panels must be connected to the internet for the dashboard to function. If everything is configured correctly, the [Data Source] tab of the dashboard will display the values coming from the HMI.

5. Dashboard Visualization Project
After adding and synchronizing all tags, you can start creating a visualization project.
All work with projects is carried out on Dashboard tab – [Project]. You can add a new project Using the [+ Create a new project] button. A domain can contain up to 1000 projects.
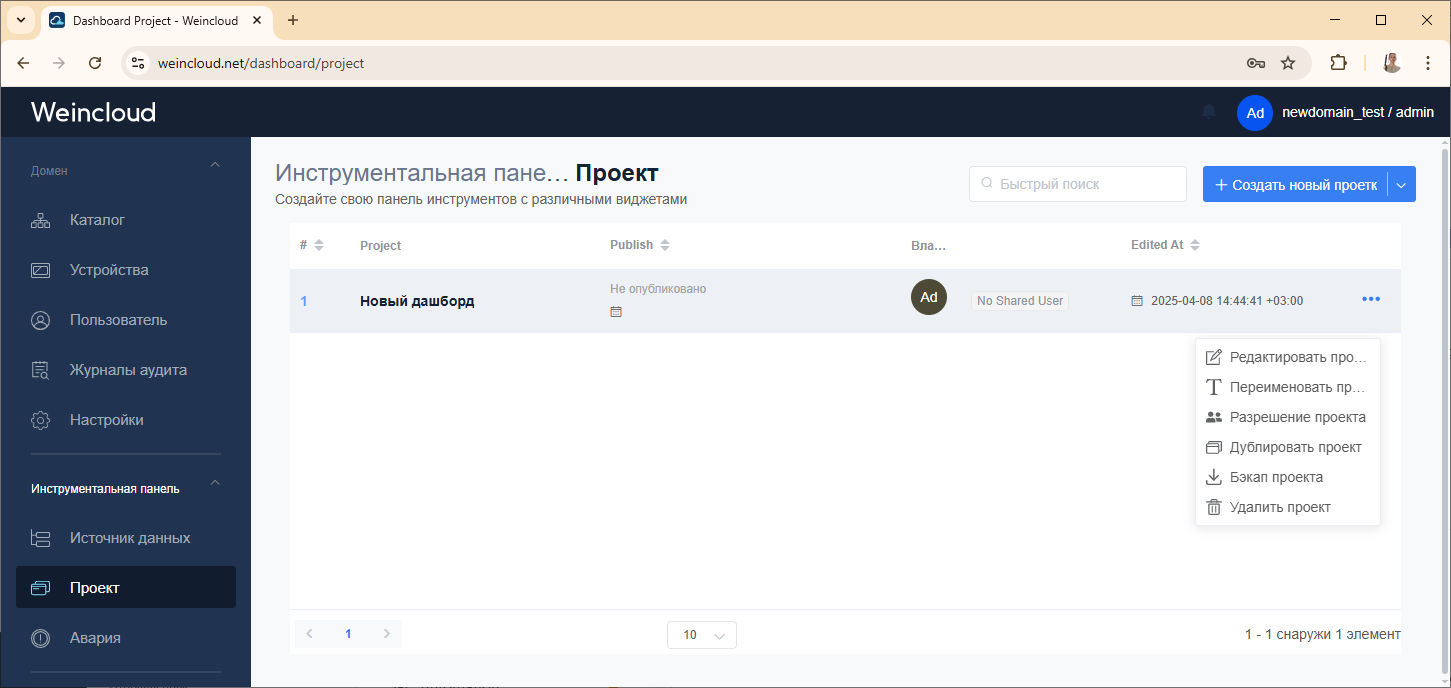
After creating a project, a number of operations are available above it:
Edit Project – opens the dashboard project editor window.
Rename project – change the project name.
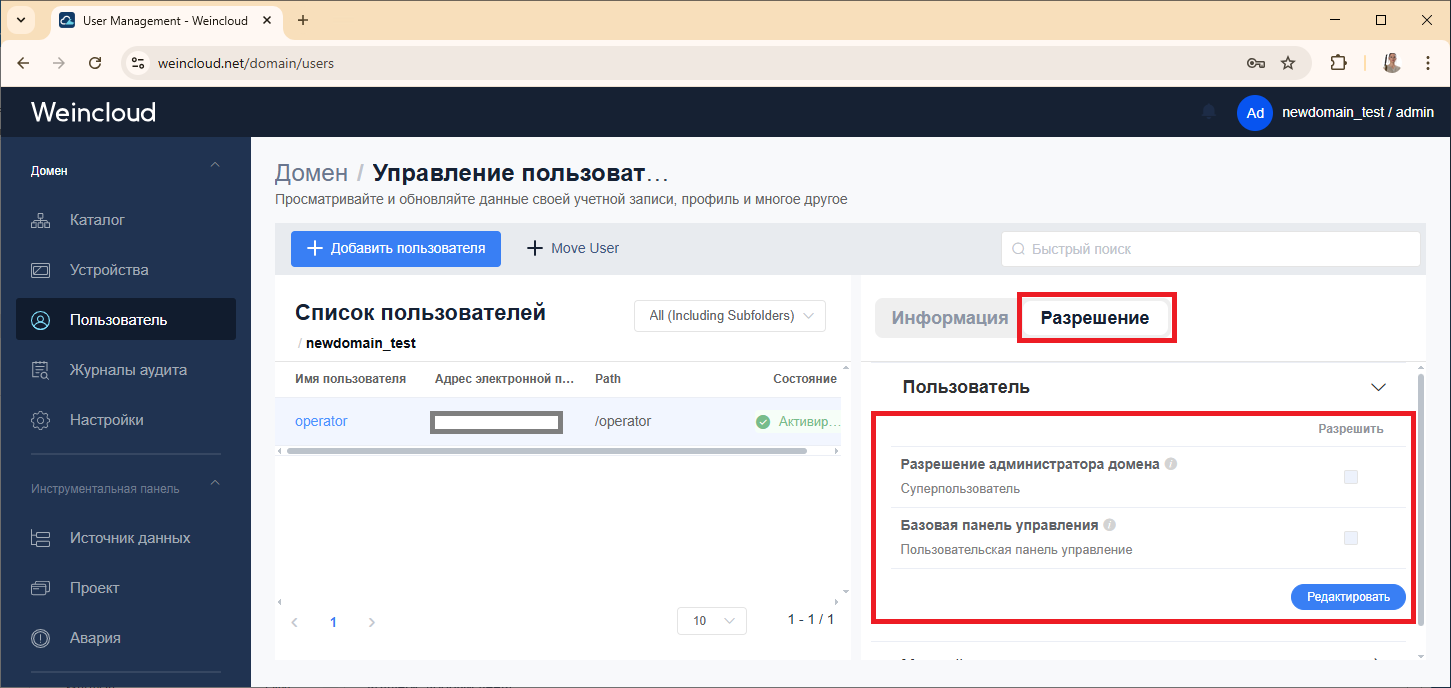
Resolution project - domain administrator and superusers can edit and publish all domain projects. Administrator, superusers, and project users* also can grant other project users* the following permissions:
* superuser and project user can be activated for the corresponding user in the permission settings:
Duplicate Project – Copy and paste the selected project under a different name.
Backup project – export the project in *.json format and the images used in the project.
Delete project – delete a project from the domain.
The project editor looks like this:
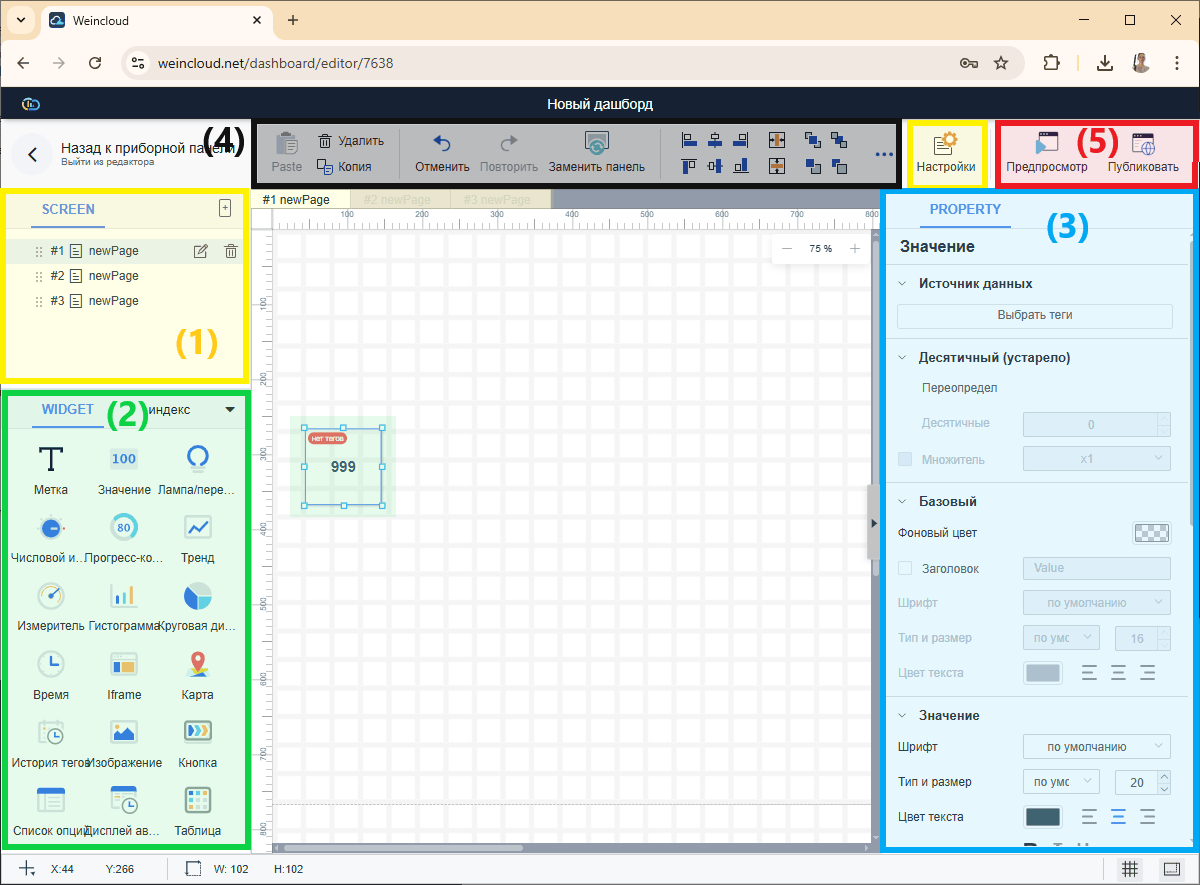
The editor page can be divided into the following main parts:
Practical steps
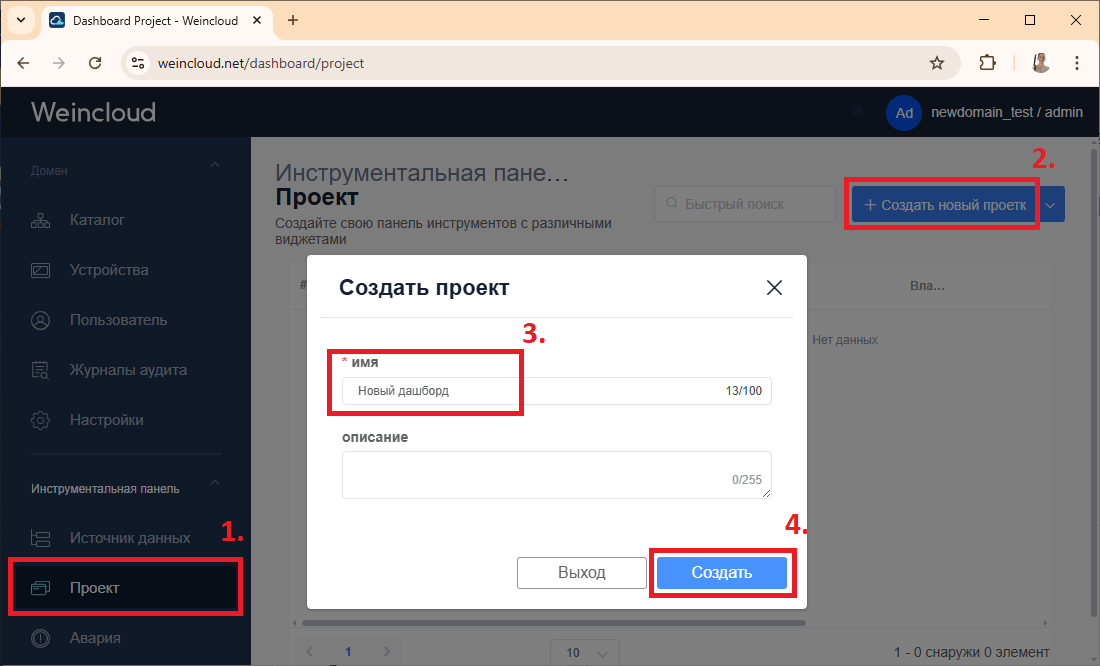
1. Create a new dashboard. In the tab Weincloud [Dashboard] – [Project], select [Create a new project], Give the project a name and click the [Create] button.
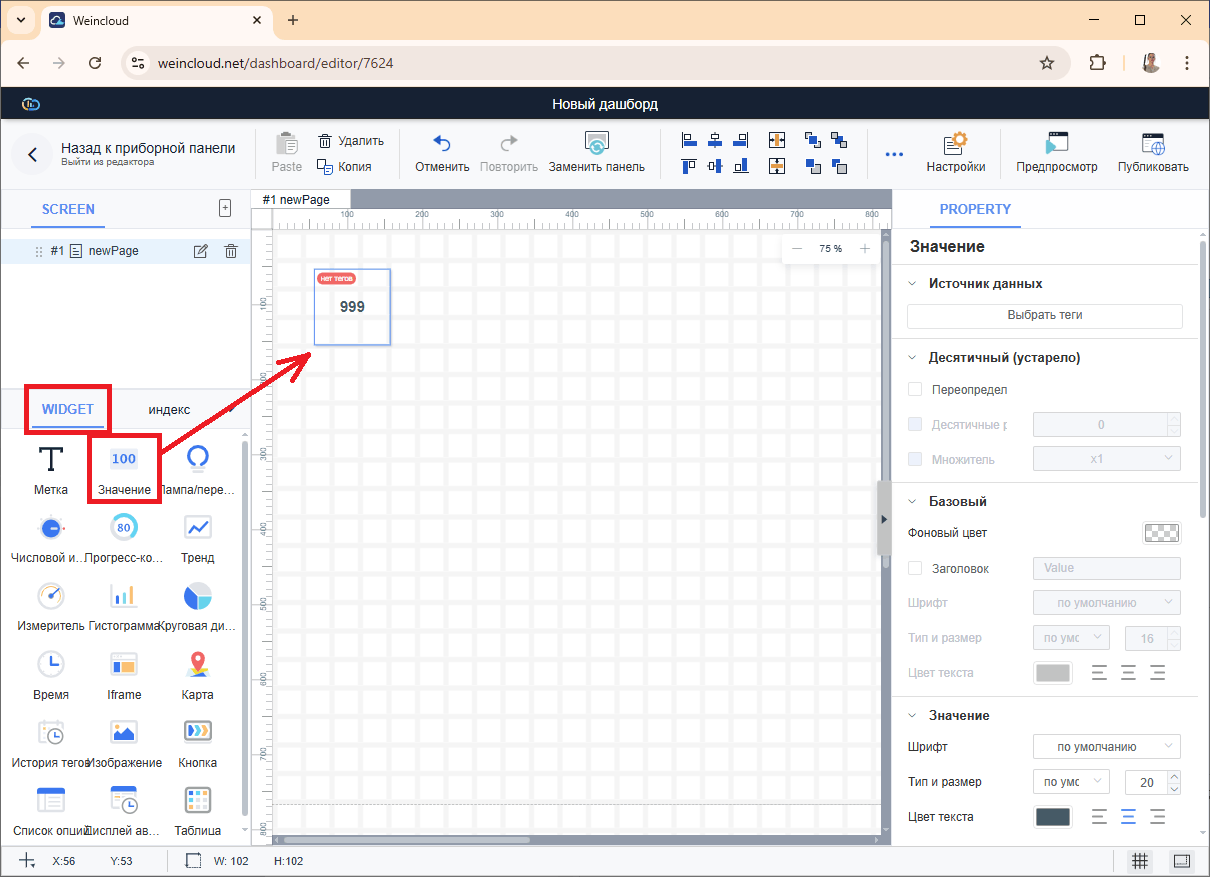
2. Place a new one on the dashboard page Widget. You can drag the widget into the workspace by holding down the left mouse button.
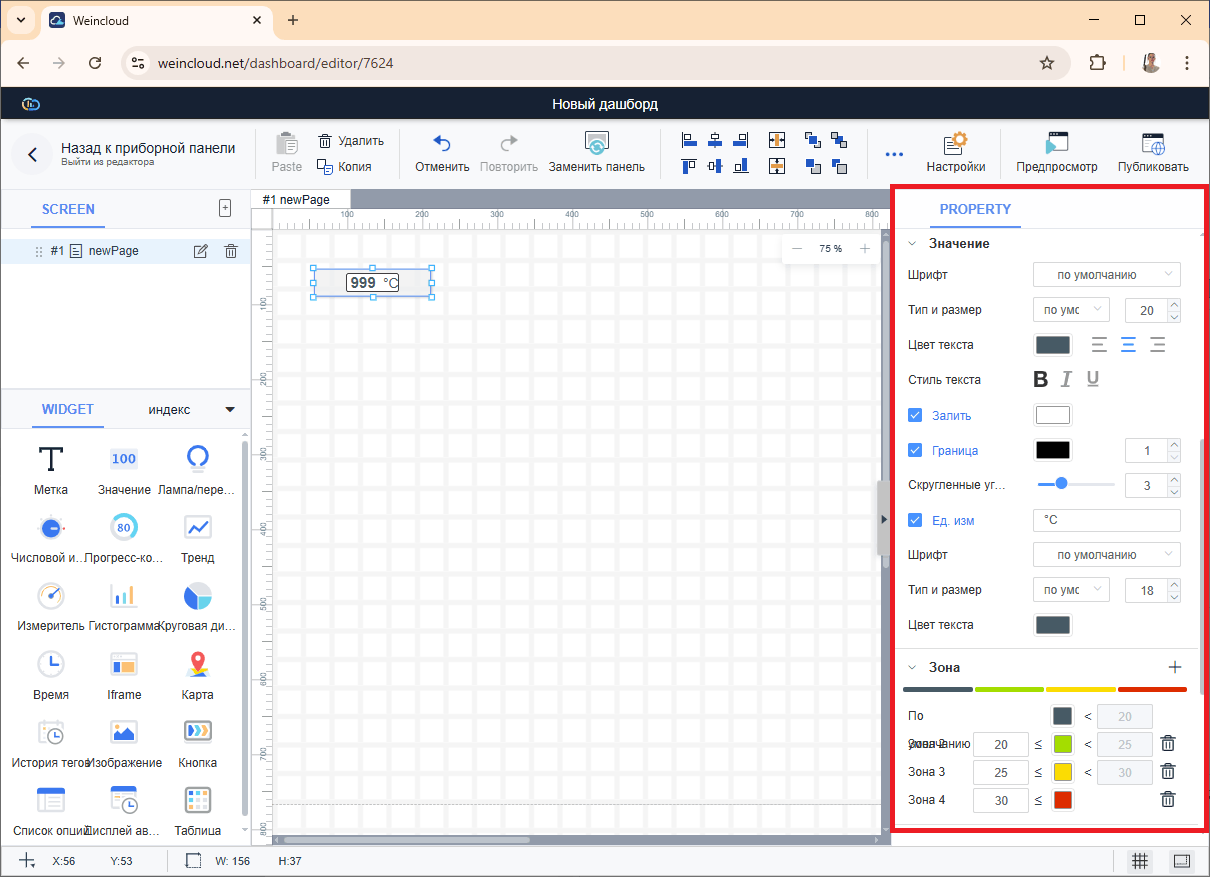
The example will describe how to work with the widget. "Meaning."
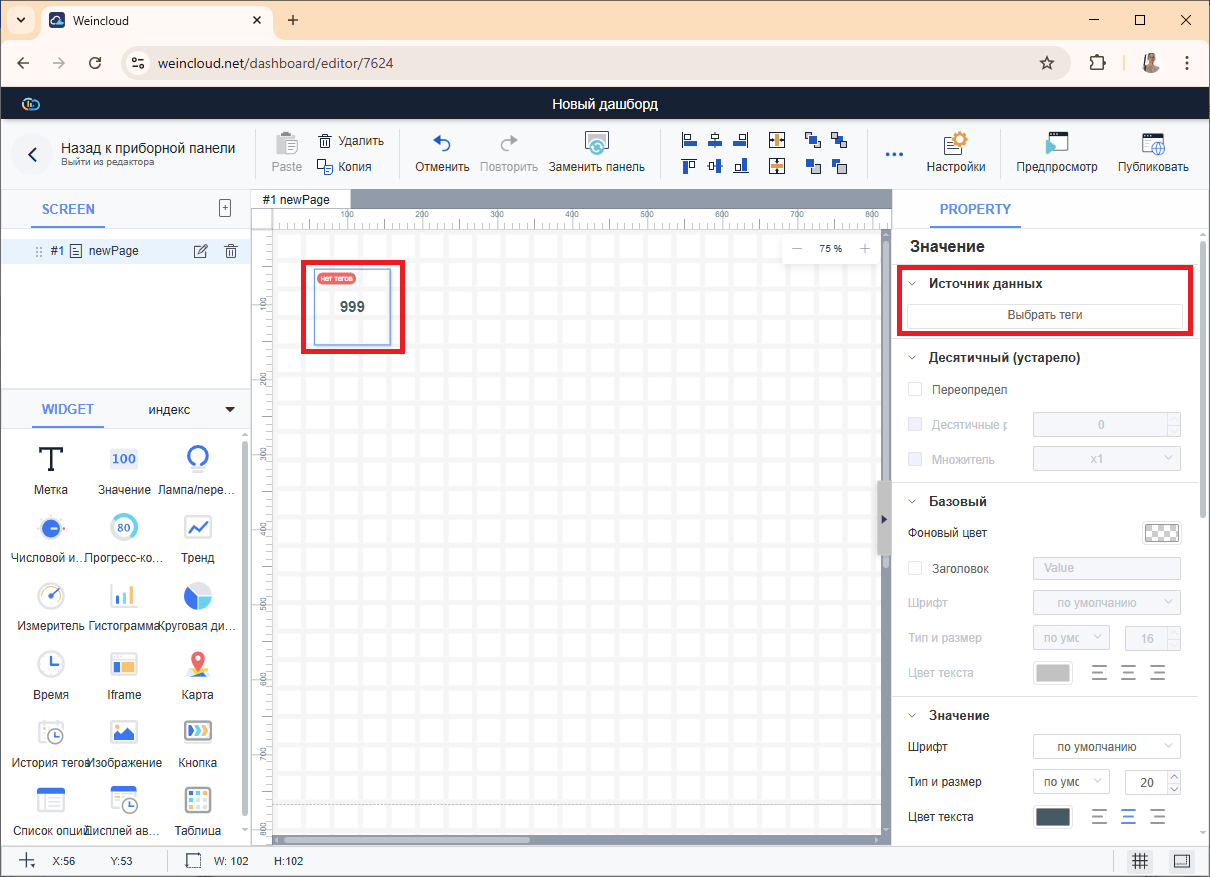
3. Next, link the widgets to specific tags. To do this, left-click on the object and on the right side of the panel parameters in the [Data Source] tab, click [Select Tags].
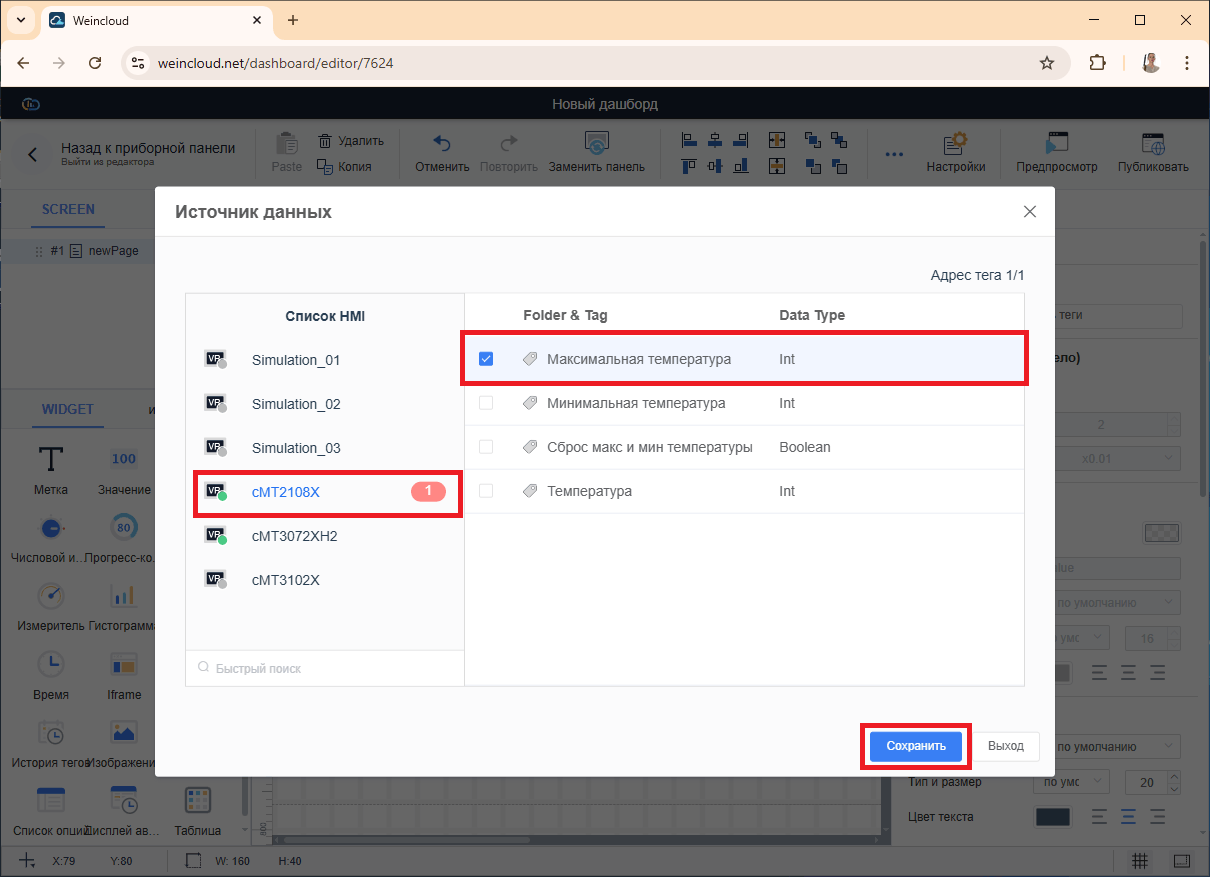
In the window that opens, select the required panel and tag, then click [Save].
4. Configure the remaining widget parameters, if necessary.
5. Adding new widgets and customizing their parameters, create your own dashboard screen.
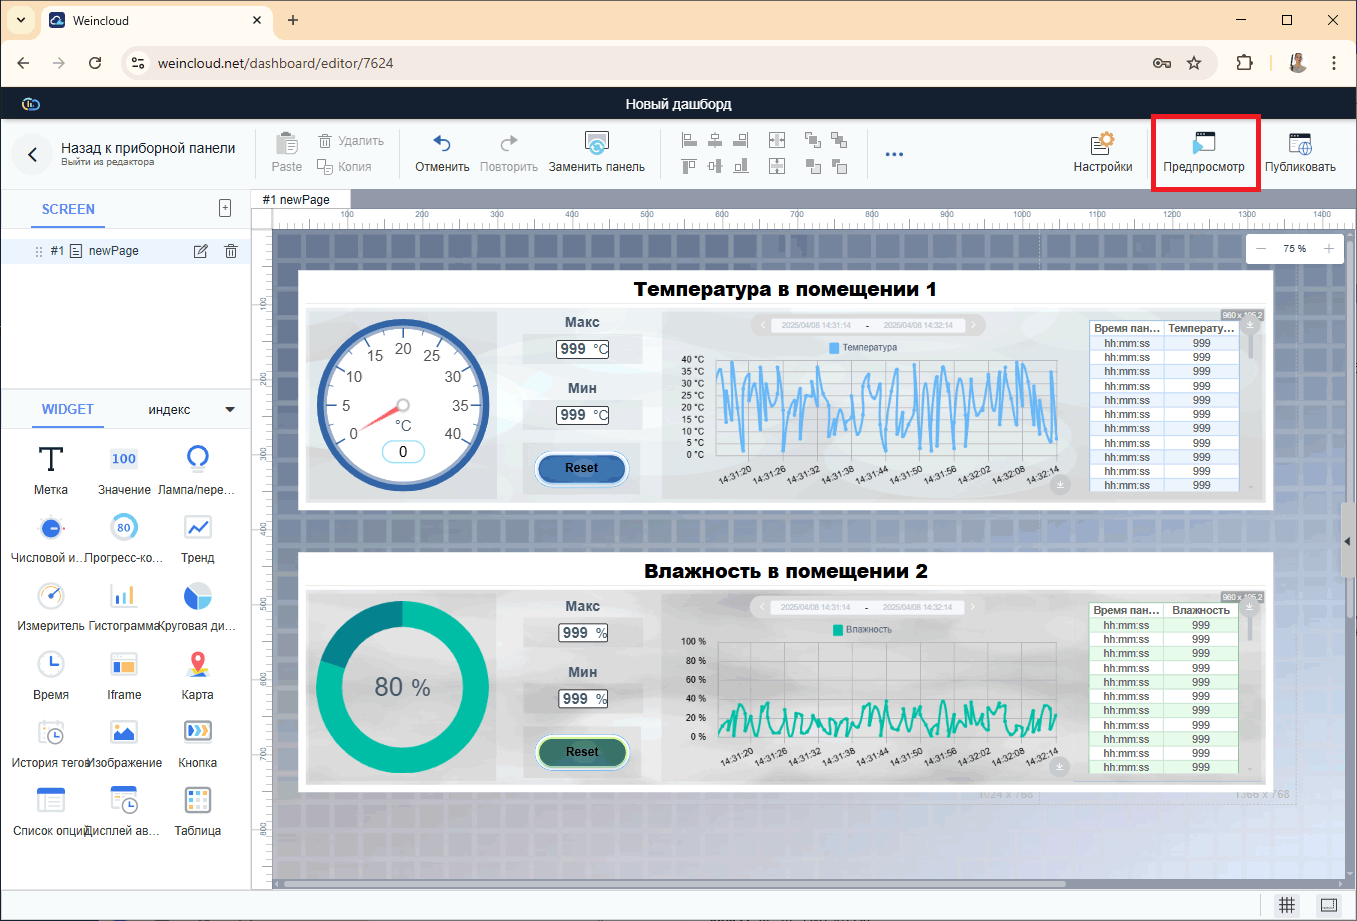
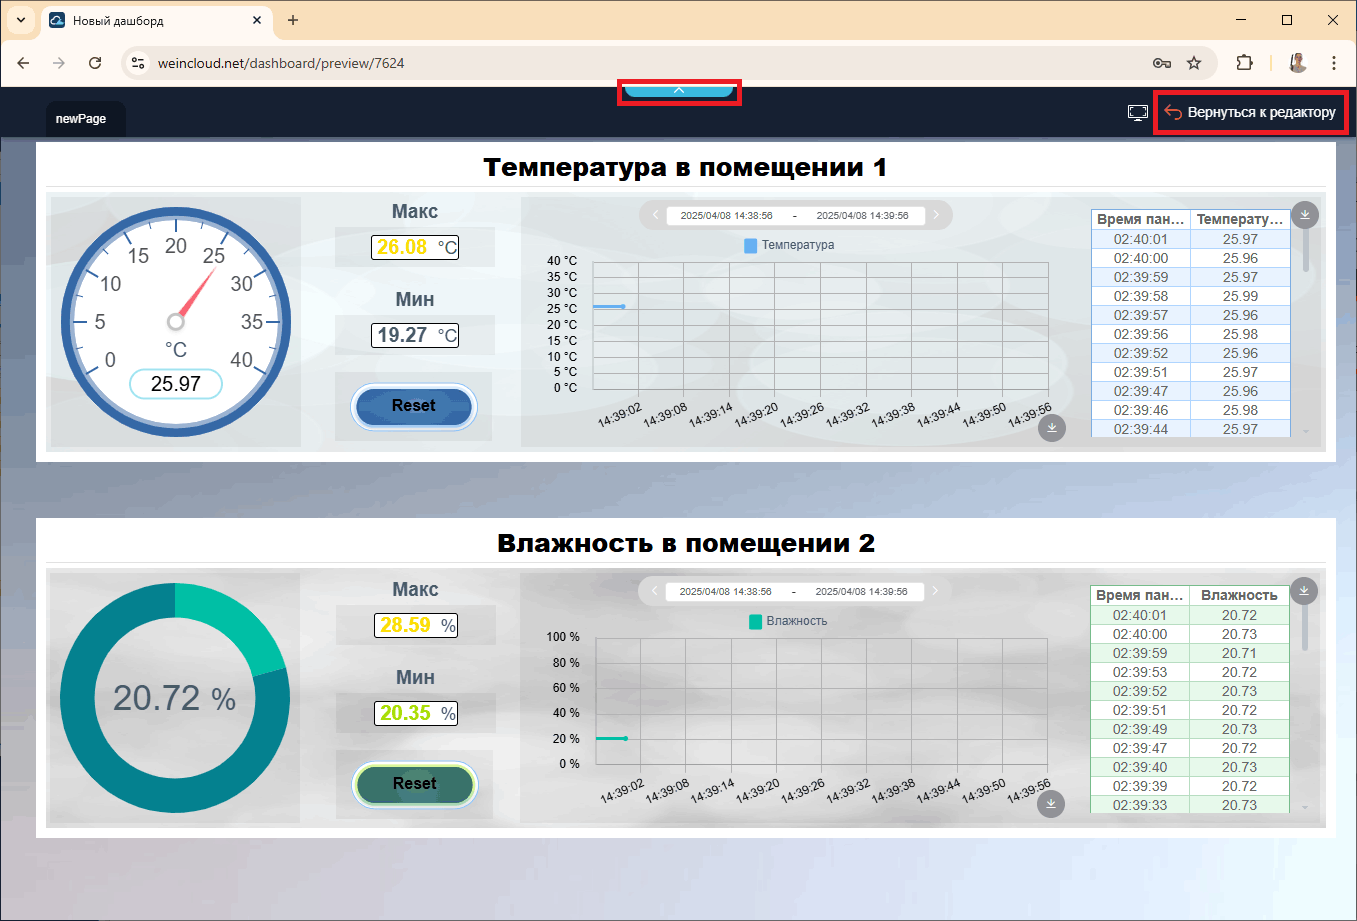
6. Check that the dashboard is working correctly using the preview function:
7. You can return back to the editor via the drop-down panel at the top.
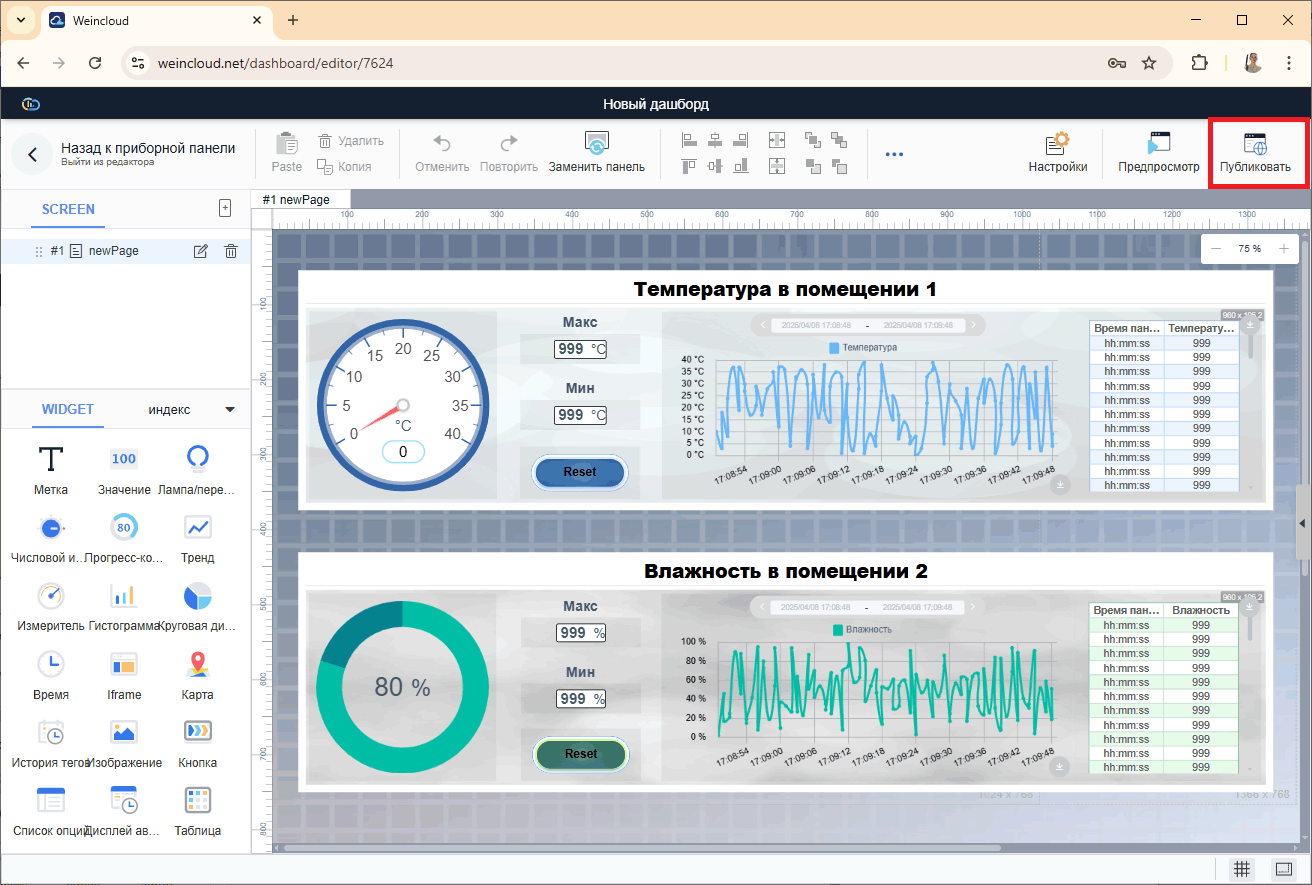
6. Publishing Dashboard
1. Now, to be able to access dashboard via URL, publish it using the [Publish] button.
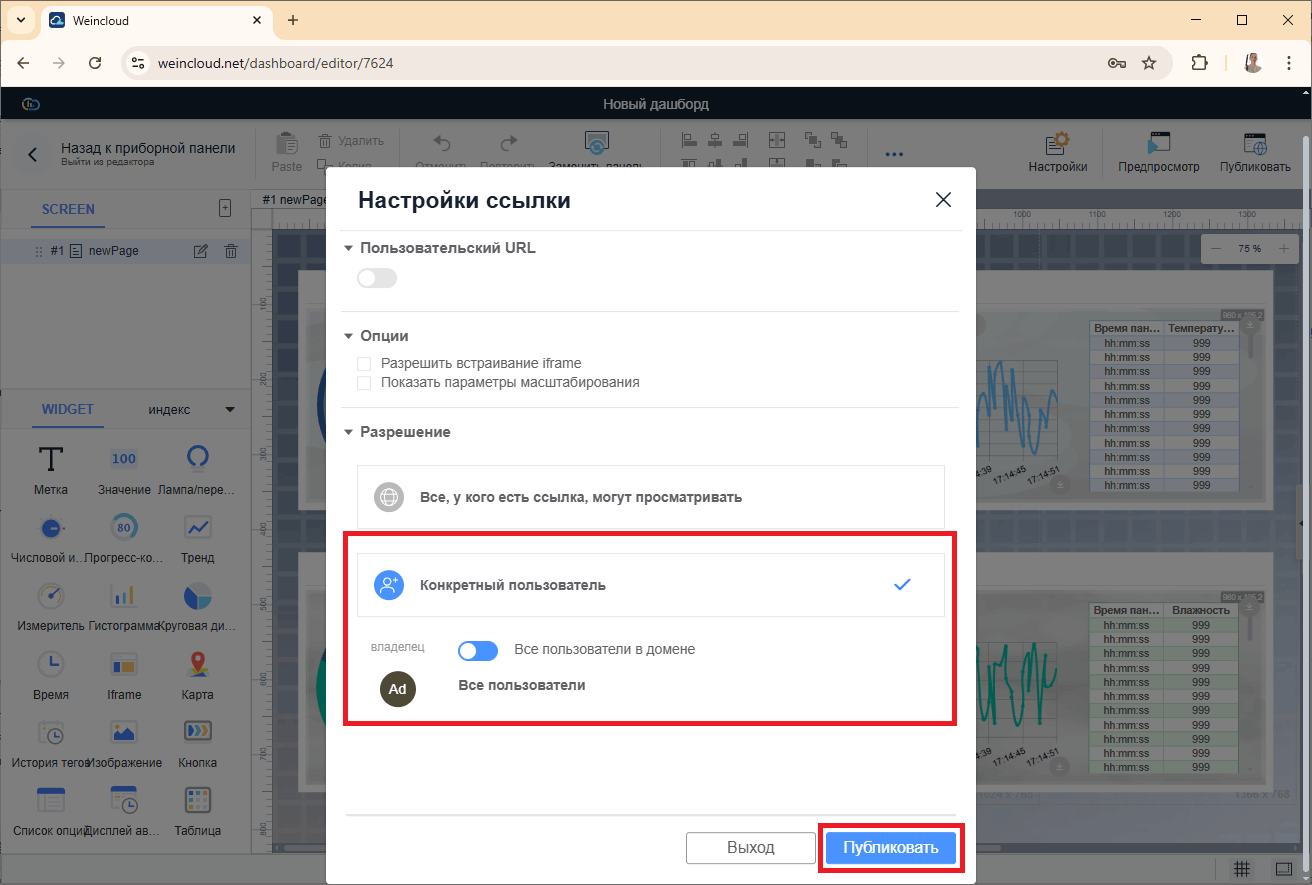
2. Select the required link settings and click [Publish].
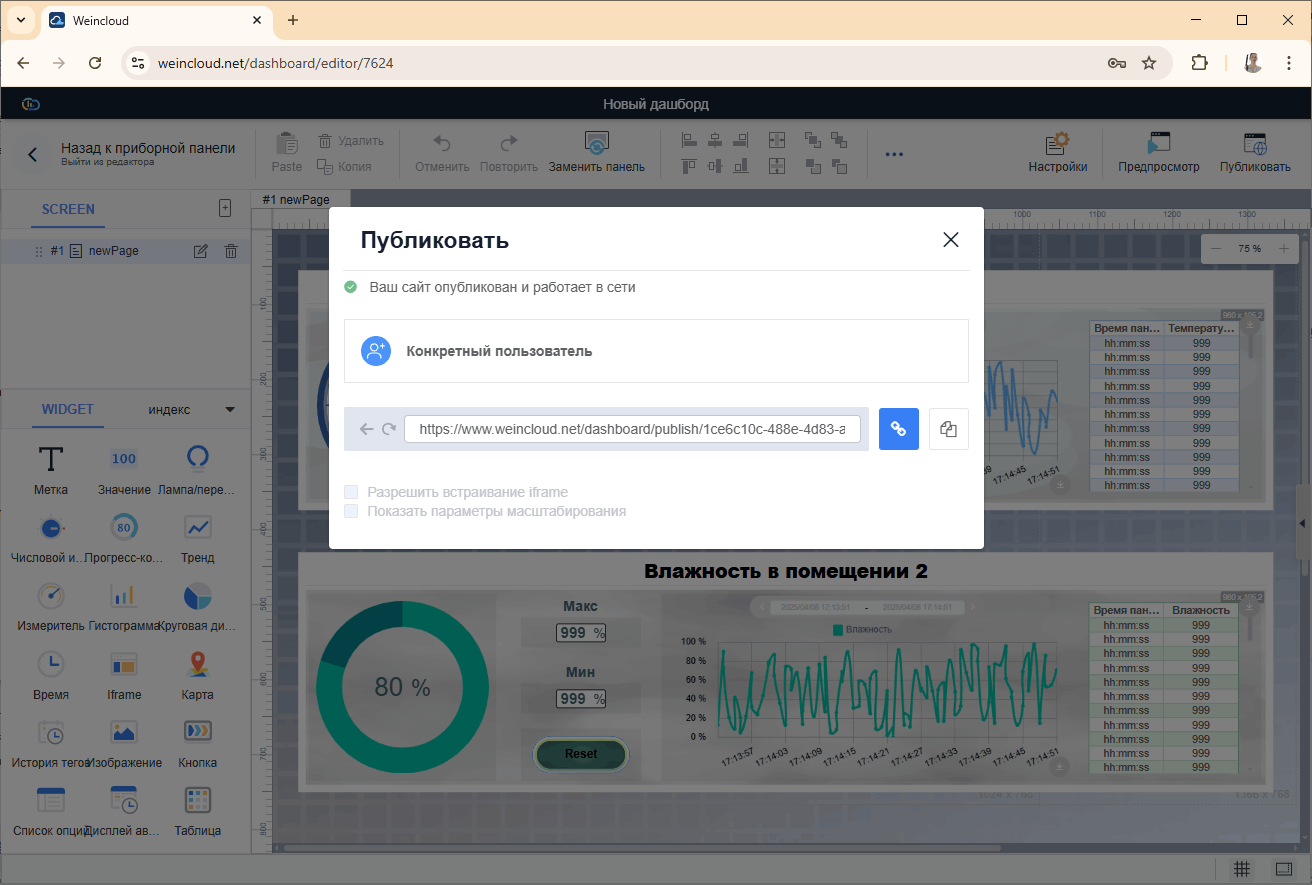
The URL link to the dashboard will appear next.
3. If the publishing option was selected [Specific user], then when you click on the link, a window will appear asking you to preliminary authorization to the domain.
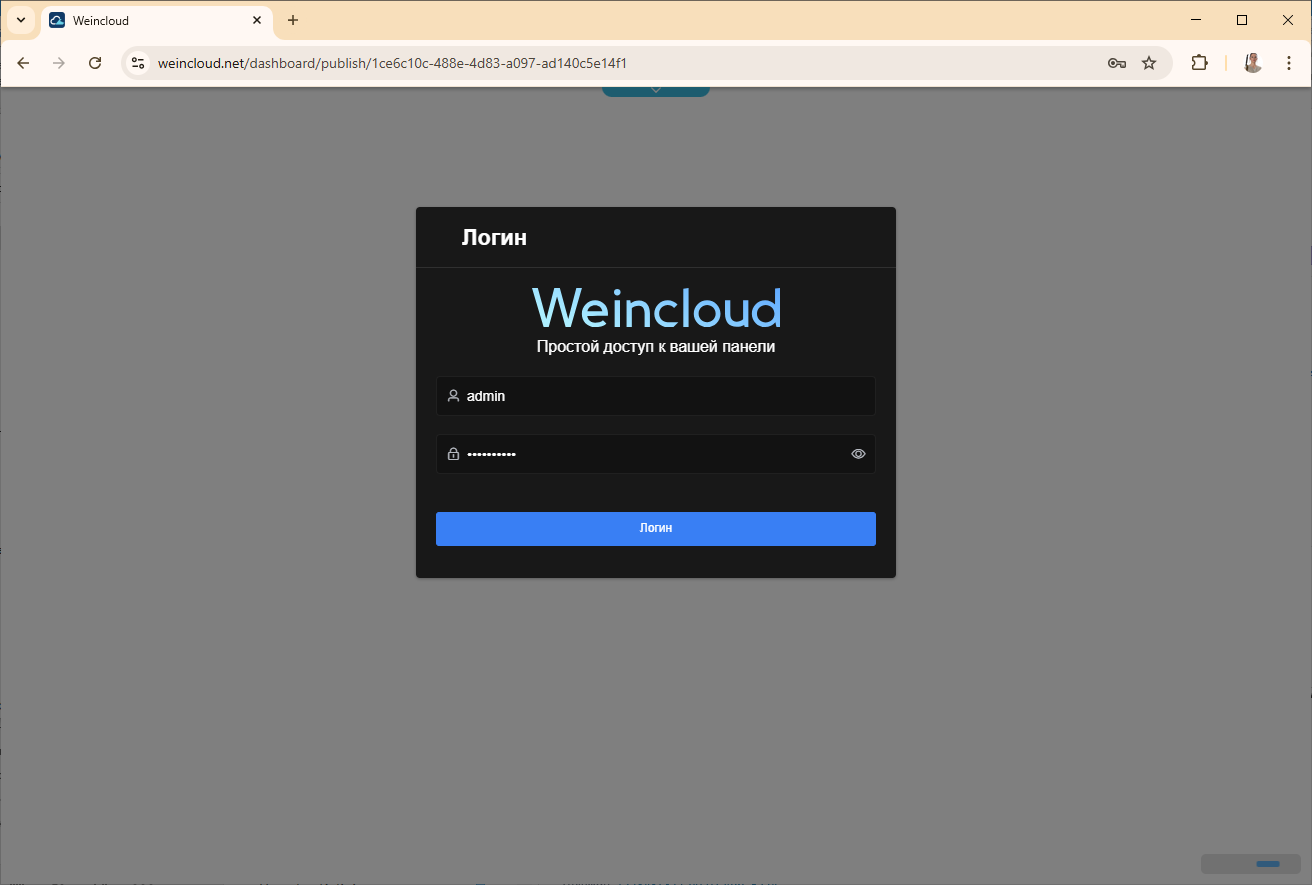
After successful authorization, a window will appear dashboard.
Open the booklet / download PDF